
How to apply liquid eyeliner

Founder & Beauty Director · 16 June 2023
Preparing your eyelids
Before applying liquid eyeliner, it's important to prepare your eyelids. Start by washing your face with a gentle cleanser and pat your eyelids dry with a clean towel. This will remove any oils or dirt that could interfere with the application process.
Next, apply a primer or eyeshadow base to your eyelids to help the eyeliner adhere better and stay in place. Allow the primer to dry completely before proceeding.
If you have hooded eyes, you may want to apply the eyeliner with your eyes open to avoid transferring onto the crease. For this purpose, tilt your chin up and look down into a mirror.
Finally, if you're new to using liquid eyeliner, consider experimenting with different eyeliner applicator tips until you find one that works best for you.
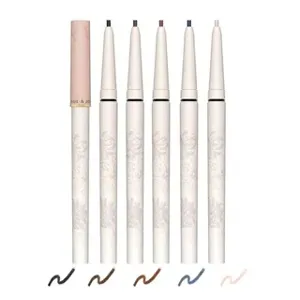
Choosing the right applicator
There are many different types of eyeliner applicators available, including brushes, pens, and felt-tips, each with their own unique benefits and challenges. When selecting an applicator, consider the type of line you want to create, the shape of your eyelid, and your skill level.
- Brushes: These applicators are versatile and can create both thin and thick lines, making them an excellent choice for beginners. They come in a variety of shapes and sizes, including angled, flat, and round, which can help create different effects on your eyelid. Some people find brushes easier to control than other types of applicators, although they can take some practice to master.
- Pens: Eyeliner pens are easy to use and can create precise lines, making them a popular choice for those with smaller or hooded eyes. They come in both brush tip and felt tip varieties, with the latter providing more control and precision. However, pens are not as versatile as other types of applicators and may not work as well for those looking to create bold or dramatic lines.
- Felt-tips: Felt-tip eyeliners are similar to pens but have a softer, more eraser-like tip that allows for more flexibility and control. They can be used to create both thin and thick lines, making them a great choice for those looking to experiment with different styles. However, felt-tip applicators can dry out quickly and require more pressure to apply, which may take some getting used to.
Starting with a basic line
Once your eyelids are prepped and you've chosen your applicator, it's time to start applying your liquid eyeliner. The following steps will help you create a basic line that you can build upon as you gain more experience.
- Hold the applicator in your dominant hand and rest your elbow on a flat surface to steady your hand.
- Starting from the inner corner of your eye, use light, short strokes to draw a thin line along your lash line. If necessary, you can draw the line in small sections to make it easier to control the applicator.
- Once you have created a thin line, you can go back and make it thicker if desired. However, keep in mind that it's usually easier to add more eyeliner than it is to remove excess.
- Continue drawing the line until it reaches the outer corner of your eye. If you want to create a winged or cat-eye look, draw a diagonal line upwards from the outer corner of your eye towards the end of your eyebrow.
- Finally, if you make any mistakes, gently remove the eyeliner with a cotton swab dipped in makeup remover. Remember to wait until the eyeliner is dry before attempting to remove it, as this will prevent smudging and smearing.
Creating Winged Liner
One of the best ways to make your eyes pop is to apply a winged liner. This look lifts your eyes and looks stunning on almost everyone. To achieve this classic look, you'll need a steady hand and the right products.
- Start by priming your eyelids with an eyelid primer.
- Next, draw a thin line as close to your lash line as possible, starting from the inner corner of your eye and working outwards. For beginners, start with a pencil liner to get the shape right before using a liquid liner.
- Decide on the length of your wing by extending the line outward at a 45-degree angle. If you're unsure of the angle, you can use a piece of tape as a guide. Place the tape at an angle from your lower lash line and draw the wing above it.
- Now, connect the end of the wing to the rest of the liner by drawing a diagonal line back down to your lash line. Fill in any gaps and smooth out any bumps to create a clean look.
- If you want a bolder look, thicken the line or add a second wing on top of the first. But be careful not to overdo it, as this can make your eyes look heavy.
Correcting Mistakes
We all make mistakes, especially when working with liquid eyeliner. But don't worry, there are easy ways to correct them without starting over!
- If you make a small mistake, use a Q-tip or an angled brush dipped in makeup remover to clean up the line.
- If you need to fix a larger mistake, apply a small amount of concealer on a flat brush and use it to cover the mistake. Blend it in with the rest of your makeup for a seamless finish.
- If your wing is too thick or uneven, use an angled brush to add a little bit of powder eyeshadow to create a sharper line.
- Remember, practice makes perfect. Don't worry if it takes a few tries to get it right!
Enhancing Your Eye Shape
Using liquid eyeliner can enhance your eye shape and make your eyes more prominent. Here are some tips for different eye shapes:
- For round eyes: Draw a thin line along your upper lash line, keeping it thin at the inner corner and thicker at the outer corner. Extend the line outwards and upwards to create a wing.
- For hooded eyes: Draw your liner slightly thicker on the outer corner to open up your eyes. Avoid creating a wing that is too dramatic, as this can make your eyes look heavier.
- For almond-shaped eyes: You have the most options! You can create a thick or thin wing, experiment with colours and shapes, or play around with different styles.
- For close-set eyes: Focus on creating a wing that extends outwards to the edges of your eyebrows. This will draw attention away from the inner corner and elongate your eyes.
Finishing the Look
Once you've applied your liquid eyeliner, it's important to finish the rest of your eye makeup to complete the look. Here are some tips:
- Apply eyeshadow before liner to create a base for your liner to stick to, and blend it out to create a gradient effect.
- Use an eyelash curler to curl your lashes and apply mascara to complete the look. You can also add false lashes for a more dramatic effect.
- Remember to remove your makeup at the end of the day and never sleep in it. Leaving your makeup on can cause breakouts and damage your skin in the long run.
With the right tools and techniques, creating a winged liner can be easy and fun. Don't be afraid to experiment with different shapes and colours to find a style that works best for you!
Shop Liquid Liners
Discover our top picks for you

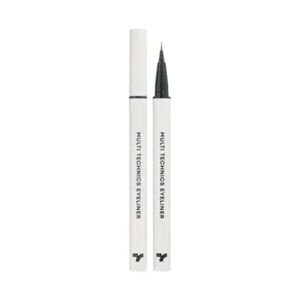
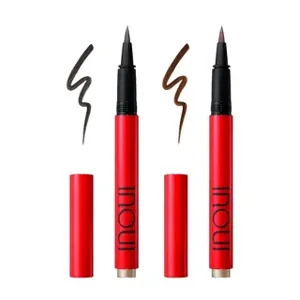
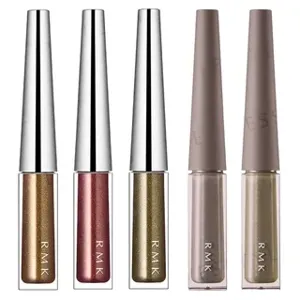
Find the Best Liquid Liners for Your Type
More to Explore
Continue your beauty journey with these guides
How to Apply Liquid Eyeliner for Hooded Eyes
Tip choice, tightlining, and wing placement that stays visible on hooded lids

Who Should NOT Use Micellar Water? 4 Skin Types to Avoid It
Unmasking the Potential Risks: Who Should Steer Clear of Micellar Water?

What is a Lip Liner?
Understanding the Purpose and Techniques of Applying Lip Liner

What is gel nail polish?
What Exactly is Gel Nail Polish?

How to use a lipstick palette
How to Master the Art of Lipstick Palettes