
How to use a concealer palette
Master the Art of Concealing: A Guide to Using a Concealer Palette

Founder & Beauty Director · 9 June 2023
Section One: Choosing the Right Shades
Choosing the right shades when it comes to concealer can be a little overwhelming, but it's important to get it right for the best results. The first step is to identify your skin tone and undertone. This will help you determine which shades of concealer will work best for you.
If you have fair skin with cool undertones, look for shades that have a pink or peach tint to them. If you have fair skin with neutral or warm undertones, go for shades with a yellow or golden hue. If you have medium skin, use a concealer that has a warm undertone. If you have a deeper skin tone, go for shades with a red or orange tint to them.
It's also important to consider what you want to achieve with your concealer. If you want to brighten your under-eye area, choose a shade that's one or two shades lighter than your skin tone. If you want to cover up blemishes, choose a shade that's exactly the same as your skin tone.
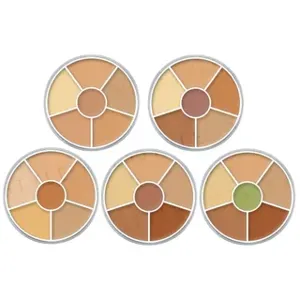
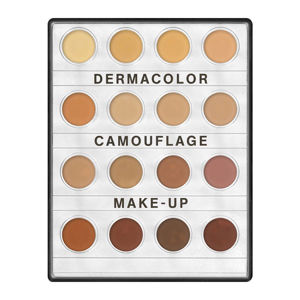
Once you've identified your skin tone and what you want to achieve, it's time to choose a concealer palette that has the right shades for you. Look for a palette that has a range of shades that match your skin tone and undertones, as well as a few shades that are one or two shades lighter and darker than your skin tone.
- Identify your skin tone and undertone
- Consider what you want to achieve with your concealer
- Choose a concealer palette that has the right shades for you
Section Two: Prepping the Skin
Before applying concealer, it's important to properly prep your skin. This will ensure that your concealer blends seamlessly with your skin and stays put throughout the day. Follow these steps to properly prep your skin:
Cleanse: Start by cleansing your skin to remove any dirt, oil, or makeup. Use a gentle cleanser that's suitable for your skin type. Rinse with lukewarm water and pat your skin dry with a clean towel.
Moisturize: Apply a moisturizer that's suitable for your skin type. This will help to hydrate your skin and create a smooth base for your concealer. Wait a few minutes for the moisturizer to absorb into your skin before moving on to the next step.
Prime: If you have oily skin or want your concealer to last longer, apply a primer to your skin. This will help to mattify your skin and prevent your concealer from creasing or fading throughout the day. Use a primer that's suitable for your skin type and apply it all over your face or just in the areas where you'll be applying concealer.
Once you've prepped your skin, you're ready to move on to applying your concealer.
- Cleanse your skin
- Moisturize your skin
- Prime your skin (if necessary)
Section Three: Applying the Correct Amount
When it comes to applying concealer, less is more. Start by applying a small amount of concealer to the area that you want to cover up or brighten. You can always add more if needed, but it's easier to add more than to remove excess concealer.
Use a small brush or your fingertips to apply the concealer. If you're using a brush, start by applying a small amount of concealer to the brush and then tap it onto your skin. If you're using your fingertips, dab a small amount of concealer onto your finger and then tap it onto your skin.
Blend the concealer into your skin using a tapping motion. This will help the concealer blend seamlessly into your skin and prevent any streaks or lines. Use a concealer brush, sponge, or your fingertips to blend the concealer into your skin.
If you're using a concealer to cover up blemishes, use a small brush to apply the concealer directly onto the blemish. Dab the concealer gently with your fingertip or a brush to blend it into your skin.
When it comes to applying concealer to your under-eye area, start by applying a small amount of concealer to the inner corner of your eye. Use a small brush or your fingertips to blend the concealer gently towards the outer corner of your eye. Make sure to blend the concealer into your skin to prevent any creases.
- Apply a small amount of concealer
- Use a small brush or fingertips to apply the concealer
- Blend the concealer into your skin using a tapping motion
Using the right tools
When it comes to concealer palettes, it’s important to use the right tools to get the best results. Most come with a brush or applicator, but sometimes these can be too small or too stiff for the product. Here are a few options you can try:
- A small, fluffy brush can help you blend the product seamlessly into your skin.
- A sponge works well for larger areas where you need more coverage.
- A stippling brush is great for blending out heavy-duty concealers or correctors.
- An angled brush is perfect for precise applications and covering blemishes.
When using brushes or sponges, make sure they’re clean and free from any previous product buildup. This will ensure your concealer goes on smoothly and doesn't clump.
Blending techniques
Blending is key when it comes to using a concealer palette. Here are a few techniques you can use to achieve a flawless finish:
- Dab the concealer onto the area you want to cover.
- Use your chosen tool to blend the product in small, circular motions.
- If you’re using a sponge, make sure it’s damp before applying to ensure a smooth blend.
- For heavy-duty concealers, use a stippling brush to blend out the edges for a seamless finish.
- Always blend outwards to avoid a harsh line between the concealed area and the rest of your skin.
Don’t be afraid to use more than one shade to achieve the perfect match. Sometimes, using a lighter shade to highlight can help give the illusion of lift, while a darker shade can add dimension and depth.
Setting the concealer
After you’ve applied and blended your concealer palette, it’s important to set it in place to avoid any creasing throughout the day. Here’s how to do it:
- Using a damp sponge or brush, apply a light layer of translucent powder over the concealed area.
- Allow it to sit for a few seconds before dusting off any excess with a fluffy brush.
- If you have oily skin or need extra staying power, you can also use a setting spray to lock the concealer in place.
Remember to avoid any excessive rubbing or touching of the concealed area throughout the day to avoid any unnecessary movement of the product.
Additional tips and tricks
Here are a few extra tricks to keep in mind when using a concealer palette:
- Always start with a clean, moisturized base to ensure the product goes on smoothly.
- Use color-correcting concealer shades to address specific areas of concern, such as green for redness or purple for sallow skin.
- If you’re using your fingers to apply your concealer, make sure they’re clean and warm to help melt the product into your skin.
- When choosing a concealer palette, consider your skin type and concerns. Opt for a palette with a mix of color-correcting and skin-toned shades to cover all your bases.
Remember, practice makes perfect when it comes to using a concealer palette. Don’t be afraid to try new techniques and tools to find what works best for you.
Shop Concealer Palettes
Discover our top picks for you


Find the Best Concealer Palettes for Your Type
More to Explore
Continue your beauty journey with these guides

What is CC Cream?
Unravelling the Magic of CC Cream: Your Ultimate Guide to Colour Correction and Flawless Skin

What is an Eyeshadow Stick?
Unravelling the Secret of Eyeshadow Sticks: Your Ultimate Makeup Game Changer

What is pressed powder?
The Lowdown on Pressed Powder: A Must-Have in Your Makeup Bag

Does brow serum work?
Can Brow Serum Really Give You Fuller, Thicker Brows?

How to use a bronzer palette
Bronzer Palettes: Your Guide to a Sun-Kissed Glow
How to use a concealer palette
Master the Art of Concealing: A Guide to Using a Concealer Palette