
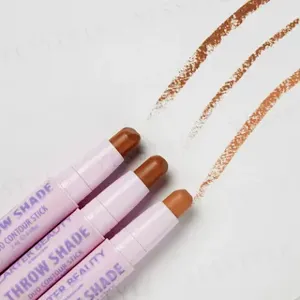
How to use a contour stick
Master the Art of Contouring with These Simple Tips and Tricks

Founder & Beauty Director · 14 June 2023
Choosing the right shade
When it comes to choosing the right shade for your contour stick, it is important to consider your skin tone and the look you are trying to achieve. It is advisable to choose a color that is two shades darker than your natural skin tone to ensure a natural-looking effect. If you are unsure, you can always test the product on your jawline to see how it blends in with your skin tone.
Another factor to consider when choosing a contour stick is the undertone of your skin. If you have warm undertones, it is recommended to choose a contour stick with a warm undertone as it will blend seamlessly with your natural complexion. On the other hand, if you have cool undertones, a contour stick with a cool undertone will complement your skin tone.
Finally, it is important to take into account the formula of the contour stick. For example, if you have oily skin, it is best to opt for a powder contour stick as it will mattify the skin, while a cream-based stick is more suitable for dry skin as it will provide hydration.
Prepping your skin
Prepping your skin before applying your contour stick is crucial to ensuring a flawless finish. Begin by cleansing your skin thoroughly with a gentle cleanser, followed by toning and moisturizing. Once your skin is prepped, apply a primer to help your makeup last longer and minimize the appearance of pores.
The next step is to apply foundation to even out your skin tone and provide a smooth base for your contour stick. When applying foundation, ensure that it matches your natural skin tone and blend well to avoid any harsh lines. Using a damp beauty sponge or a brush to blend is recommended as it will give you a smoother finish.
Once your foundation is applied, it is time to move on to the contour stick. Apply the stick in the areas you want to create depth and definition, typically the hollows of your cheeks, along your jawline, and around your hairline. Begin with a subtle application and build up the intensity gradually until you achieve your desired look.
Mapping out your face
Mapping out your face is a crucial step when it comes to contouring. It involves identifying the areas of your face that you want to highlight and add definition to while creating depth and shadow in other areas.
To create a subtle contour, draw a light line along the hollows of your cheeks, following the natural curve of your cheekbones. Blend the contour stick using a beauty sponge, moving the sponge upwards toward your ear to ensure a natural blend.
If you want to add depth to your jawline, apply the contour stick along the jawline and blend downwards. Be careful not to apply too much product as it can make your face appear muddy. To create a more chiseled look, apply the contour stick in a small line just underneath your bottom lip.
Finally, apply highlighter to the high points of your face, such as your cheekbones, the bridge of your nose, and your cupid's bow. This will create a beautiful contrast between the light and shadowed areas of your face, giving you a defined and radiant look.
- Choose a contour stick two shades darker than your natural skin tone
- Consider your skin undertones when choosing a contour stick
- Take into account the formula of the contour stick based on your skin type
- Prep your skin by cleansing, toning, moisturizing and applying primer and foundation
- Apply contour stick in areas where you want to create depth and definition
- Gradually build up the intensity of the contour stick for a subtle look
- Map out your face by identifying the areas you want to highlight and add definition to
- Apply highlighter to the high points of your face for a radiant look
Applying the Product
When it comes to contouring your face, using a contour stick can simplify the process and give you the perfect sculpted look. But before you start the application process, make sure you have the right product for your skin tone and texture. It's important to choose a shade that is one or two shades darker than your natural skin tone to make it look natural. Follow these steps to apply the contour stick:
- Start with a clean and moisturized face. Apply a small amount of primer to even out the surface and provide a smooth base.
- Use the contour stick to draw lines on your cheeks, temples, forehead, jawline, and nose. Make sure to blend it well into your skin using a contour brush or your fingers.
- Apply the highlighter above the cheekbones, down the center of the nose, the forehead, and the brow bone. Use a blending brush to blend these lines for a seamless finish.
- Once you have applied the contour and highlighter, use a translucent setting powder to set the product. This will ensure that it lasts all day and prevents any creasing or smudging.
Blending Techniques
Blending is a crucial step in the contouring process to ensure that the product looks natural and seamless. Here are some blending techniques to help you achieve the desired look:
- Use a contour brush or a beauty blender to blend the product into your skin. This ensures that the product doesn't look cakey or patchy. Blend in circular motions or upward strokes for a natural appearance.
- Make sure to blend the product onto the hairline and down the neck to avoid any harsh lines. This creates a natural, gradient effect.
- If you feel like the contour is too harsh, use a clean makeup brush to blend out any excess product. Blending outwards and upwards will help to soften the look without removing too much product.
- If you accidentally apply too much product, use a clean brush to blend it out. Alternatively, you can use a makeup wipe to remove any excess product.
Setting the Contour
Setting the contour is an essential step to ensure that it lasts all day without smudging or creasing. Here are some tips to help you set the contour:
- Use a translucent setting powder to set your contour and highlighter. This powder is lightweight and will keep the product in place without adding any extra pigment.
- Make sure to use a fluffy powder brush to apply and blend the setting powder. This prevents any harsh lines or patches and gives a natural finish.
- When applying the setting powder, focus on the areas where you have applied the contour and highlighter. This helps to set the product in place and prevents any smudging or creasing throughout the day.
- If you have oily skin, apply a little extra powder to the T-zone area to prevent oil buildup and ensure that your contour stays in place.
Tips and Tricks
Contouring can be tricky, but with a bit of practice, you can master the technique and achieve a natural, sculpted look. Here are some tips and tricks to help you get the most out of your contour stick:
- Choose a shade that is one or two shades darker than your natural skin tone to make it look natural. If you're unsure, go for a shade that is slightly lighter as it's easier to add more product than to remove excess product once applied.
- Blend the product well into your skin to avoid any harsh lines. Use a blending brush or your fingers to blend in circular motions for a natural appearance.
- Apply the highlighter sparingly and blend well to avoid any unflattering shiny spots. Remember, less is more when it comes to highlighter.
- When contouring your nose, make sure to apply the product to the sides of your nose and blend well. This gives the illusion of a slimmer nose without looking obvious.
- If you're using a cream contour stick, choose a cream highlighter to ensure that the products blend well together.
Shop Contour Sticks
Discover our top picks for you
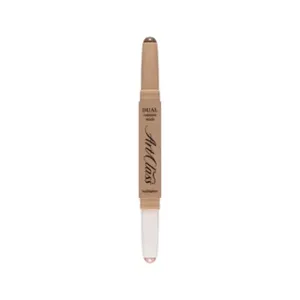
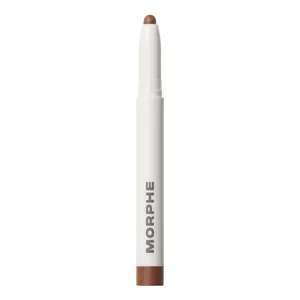


Match Stix Contour Skinstick

Precise Contour & Highlight Stick


Find the Best Contour Sticks for Your Type
More to Explore
Continue your beauty journey with these guides

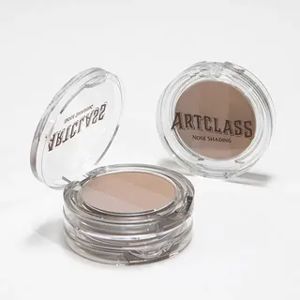
How to use a Cream Contour Palette
Mastering the Art of Crafting Defined Features with a Cream Contour Palette

Are Tanning Mitts worth using?
"Unveiling the Truth: The Pros and Cons of Using Tanning Mitts"

How does a self-tanning lotion work?
"Unveiling the Science Behind Your Favourite Self-Tanning Lotions"

What is pressed powder used for?
The Ultimate Guide to Understanding Pressed Powder: Uses and Benefits

How to Remove Eyelash Glue Safely (3 Methods)
Say Goodbye to Lash Glue Residue with these Easy Steps
How to use a contour stick
Master the Art of Contouring with These Simple Tips and Tricks