
How to use a Tanning Mitt
Mastering the Art of a Perfect Sun-Kissed Glow with a Tanning Mitt
25 October 2023
Understanding What a Tanning Mitt Is
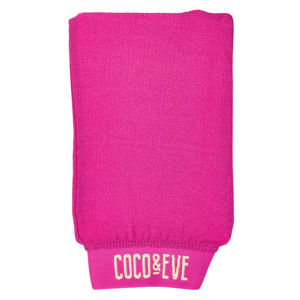
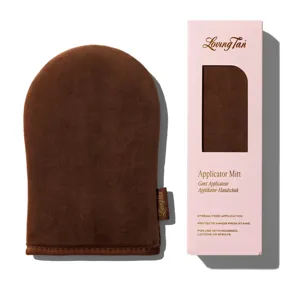
A tanning mitt is a simple yet indispensable tool in the pursuit of a perfect tan. It is designed to help distribute tanning solutions evenly over the skin surface, minimizing streaks and ensuring an all-over even, natural-looking colour. The mitt is typically made of soft, non-absorbent materials to prevent the tanning solution from soaking in, effectively reducing product waste and keeping your hands stain-free throughout the application process.
Preparation Before Using a Tanning Mitt
Before using a tanning mitt, it's crucial to thoroughly prepare your skin. Start with exfoliation, either with an exfoliating glove or a body scrub, focussing on areas with rough skin such as knees, elbows, ankles and feet. Removing dead skin cells enables the tanning solution to better penetrate and stick to your skin, resulting in a smoother and more lasting tan. After exfoliation, ensure your skin is dry and free from any products that might create a barrier, like oils and creams.
Choosing the Right Tanning Product
There is an abundance of tanning solutions in the market, each designed to cater to different skin types and desired tan intensity. Choose a product that suits your skin type and desired result. Note that the same product can produce different results on different people, so it might take a few tries before finding the perfect tanning solution for you. Also, take note of ingredients, staying away from products with harmful chemicals or irritants, particularly if you have sensitive skin.
Step-by-Step Guide to Using a Tanning Mitt
Using a tanning mitt is easy if you follow these simple steps:
- Put on the tanning mitt. It should fit snugly on your hand.
- Squeeze a small amount of self-tanner onto the mitt.
- Start applying the tanning solution onto your skin, starting from the ankle and working your way upwards. Remember to use long, sweeping motions for even distribution and blend well at the wrists and ankles.
- Wait for the first layer to dry before applying a second layer if you want a darker tan. Remember that building the tan in layers will allow for a more natural and controlled result.
- Allow the tan to develop for the specified amount of time on the product's label. Avoid getting your skin wet during this time.
Cleaning and Maintaining Your Tanning Mitt
Cleaning your tanning mitt after each use prolongs its life and ensures that it continues to work effectively. Rinse it with warm soapy water until all the tanning solution is washed out. Avoid wringing it; instead, squeeze out excess water gently and lay it flat to dry in a room temperature environment, keeping it away from heat sources that might damage the mitt's fabric. If cared for properly, a tanning mitt can last for several tanning sessions.
Common Mistakes to Avoid While Using a Tanning Mitt
To get the most out of your tanning mitt, avoid falling into these common traps:
- Skipping exfoliation: This could result in a patchy, uneven tan.
- Applying too much tan at once: This could lead to an experimental look too dark for you and harder to correct. It is smarter to go light and build up if required.
- Rushing the process: Applying self-tanner requires time and care. If hurried, you’re more likely to make mistakes and end up with uneven colouring.
- Neglecting mitt care: Regular cleaning is essential to prolong the life of your mitt.
Additional Tips for a Perfect Tan Using a Tanning Mitt
Beyond using a tanning mitt effectively, here are some additional tips to achieve a perfect tan:
- Moisturise after tanning: Once your skin has absorbed the tanning solution and is dry, moisturise it to lock in the tan and keep the skin hydrated.
- Reapply every 2-3 days: To maintain your tan, reapply the tanning solution every few days or as per the product's instructions.
- Protect your skin: Use SPF when out in the sun to protect your skin and maintain your tan.
And remember, achieving a perfect, golden tan may take practice, but the results are truly worth it. Enjoy the process and happy tanning!
Shop Tanning Mitts
Discover our top picks for you


Sunny Honey Soft Velvet Self Tan Mitt-No Colour


Find the Best Tanning Mitts for Your Type
More to Explore
Continue your beauty journey with these guides

What is the difference between a day and night moisturiser?
"Unravelling the Differences: Day Moisturiser vs Night Moisturiser Explained"

Are Tanning Mitts worth using?
"Unveiling the Truth: The Pros and Cons of Using Tanning Mitts"

How to wash a Tanning Mitt
Unveiling the Simple Steps to Keep Your Tanning Mitt Clean and Effective
How to use a Tanning Mitt
Mastering the Art of a Perfect Sun-Kissed Glow with a Tanning Mitt

At what age should you start using Anti Ageing Serums?
"Unlocking the Right Time: When Should You Begin Incorporating Anti-Ageing Serums into Your Skincare Routine?"

What is a bronzer stick?
Get Your Glow On: A Guide to Using Bronzer Sticks for Flawless Summer Skin.