
Where to apply stick highlighter
"Enhance Your Glow: A Guide to Perfectly Placing Stick Highlighter"

Founder & Beauty Director · 27 June 2023
Choosing the right stick highlighter shade
When it comes to choosing the right stick highlighter shade, it's important to consider your skin's undertones. If you have warm undertones, opt for highlighters with golden or peachy tones that will complement your natural complexion. On the other hand, if you have cool undertones, choose highlighters with pink or silvery tones to enhance your skin's natural radiance.
Another factor to consider when selecting a stick highlighter shade is the intensity of the colour. It's essential to choose a shade that complements your skin tone without being too overpowering. If you have fair skin, a light champagne or pink-toned highlighter will enhance your natural glow without looking too heavy. For medium skin tones, opt for a slightly deeper shade that will add warmth to your complexion. If you have darker skin, choose a highlighter with deeper hues such as copper or bronze to complement your skin's natural tones.
Ultimately, the key to selecting the right stick highlighter shade is to experiment with various shades to see what works best for your skin tone. A good rule of thumb is to choose a shade that is one to two shades lighter than your skin tone for a natural-looking radiance.
Prepping the skin for stick highlighter
Before applying stick highlighter, it's essential to prep your skin to ensure a flawless application. One of the best ways to do this is to start with a clean canvas. Begin by washing your face with a gentle cleanser and patting it dry with a clean towel.
Next, apply a lightweight moisturizer to your skin to help hydrate it and create a smooth base for your stick highlighter. Wait a few minutes for the moisturizer to absorb into your skin before moving on to the next step.
If you have any blemishes or dark circles, apply a colour corrector before applying your stick highlighter. This will help to neutralize any unwanted tones in your skin and create a more even base for your highlighter to shine.
If you're using a stick highlighter with a dewy finish, avoid applying powder products to your skin as they can dull the glow. Instead, opt for cream products such as blush and bronzer to create a seamless, radiant finish.
Highlighting the cheekbones
Highlighting the cheekbones is an excellent way to add dimension and radiance to your face. To begin, apply your stick highlighter to the top of your cheekbones, starting at the outer corner of your eye and blending upwards towards your temple. Use a blending brush or your fingers to buff out any harsh lines.
If you want to enhance your cheekbones even further, apply your highlighter to the tip of your nose and the cupid's bow of your lips. This will help to create a more sculpted and contoured look.
To ensure a long-lasting glow, set your stick highlighter with a setting spray. This will help to lock it in place and prevent it from fading throughout the day.
Remember, less is more when it comes to applying stick highlighter. It's better to start with a light layer and build up the intensity slowly. This will help to create a natural-looking radiance that enhances your features without overpowering them.
Where to Apply Stick Highlighter
Stick highlighter has become a must-have for makeup enthusiasts seeking to achieve a bright and luminous glow. This versatile makeup product is easy to use and can be applied to various parts of the face for a radiant look.
Highlighting the Brow Bone
Highlighting the brow bone can help lift the eyes and create the illusion of a higher arch. To achieve this look, apply stick highlighter just below the brow area and blend gently using your fingers or a brush. Be sure to blend the highlighter evenly to avoid any harsh lines or patches.
Some people also like to apply a little amount of highlighter to the inner corner of their eyes after highlighting the brow bone. This helps brighten up the eye and create a more awake, youthful appearance.
Using a stick highlighter for this technique is especially beneficial because it allows for easy and precise application, making it easy to target the areas you want to highlight.
Highlighting the Inner Corners of the Eyes
The inner corners of the eyes are one of the most overlooked areas when it comes to makeup application. However, highlighting this area can make a significant difference in your overall look and brighten up the eye area.
To apply highlighter to the inner corners of the eyes, use a small brush or your fingers to dab a small amount of the highlighter on the inner corners of each eye. Be sure to blend it out for a seamless transition into the rest of your eye makeup.
This technique will make you look more awake, fresh, and youthful. Besides, using stick highlighter for this purpose will make application easy, and the small size of the stick will ensure that you don't go overboard with the highlighter.
Highlighting the Nose
Highlighting the nose is a technique that adds dimension and definition to the face. If you have a relatively flat nose, you can use highlighter to create depth and make it appear more prominent.
To highlight your nose, apply the highlighter down the center of the nose, starting from the bridge and ending at the tip. Use a brush or your fingers to blend the highlighter well to avoid any harsh lines. You can also apply a small amount of highlighter to the tip of your nose to make it appear more lifted.
When applying highlighter to the nose, it's important to use only a small amount. Using too much highlighter can make your nose look oily instead of creating the desired effect.
Highlighting the Cupid's Bow
Highlighting the cupid's bow can help enhance your lips and create the illusion of fuller lips. To do this, apply the highlighter directly above the cupid's bow in a small "V" shape. Use your finger or brush to blend it gently.
This technique will not only highlight the lips but also create a subtle contour around the mouth, making them look more prominent and defined. Use a stick highlighter for this technique to ensure precise application and keep the highlighter from drifting outside the intended area.
In conclusion, stick highlighter is a versatile and easy-to-use makeup product that can create a radiant and glowy look. Whether you want to highlight your brow bone, inner corners of the eyes, nose, or cupid's bow, using a stick highlighter can make a big difference. Use these techniques to add dimension and definition to your face and achieve a bright and luminous glow.
Shop Highlighter Sticks
Discover our top picks for you
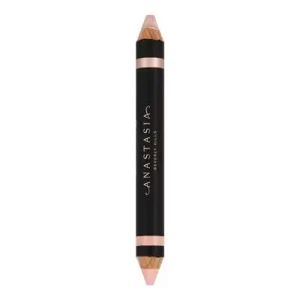
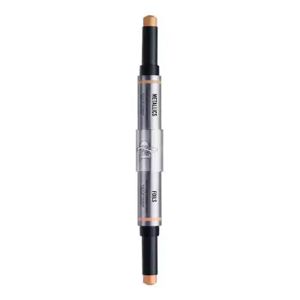
Colorfix Stix- Multi-Use Pearl Pigment Stick For Eye, Cheek & Lip


Stick Highlighter


Find the Best Highlighter Sticks for Your Type
More to Explore
Continue your beauty journey with these guides

What type of skin suits liquid blush?
"Decoding the Perfect Skin Type for Liquid Blush Application"

Tips when self tanning
"Essential Guidelines for Achieving a Perfect DIY Sunless Tan"

Is gel nail polish bad for your nails?
Is Gel Nail Polish Harmful for Your Nails?
Where to apply stick highlighter
"Enhance Your Glow: A Guide to Perfectly Placing Stick Highlighter"

What is a stick highlighter?
"Get That Glow: Everything You Need to Know About Stick Highlighters"

Stick vs Powder Highlighter: Which Suits You?
The ultimate guide to choosing the perfect highlighter for your glow-up.