
How to apply cream highlighter
Achieve a Luminous Glow: Mastering the Art of Cream Highlighter
14 July 2023
Preparation
When it comes to applying cream highlighter, preparation is key. The first step is to ensure that your skin is clean and moisturized. Start by washing your face with a gentle cleanser to remove any dirt or impurities and then follow up with a lightweight moisturizer to prime the skin for makeup application. Allow the moisturizer to fully absorb into the skin before moving on to the next step.
Next, it's important to apply a good quality primer onto your face. Primer helps to create a smooth and even base for makeup, allowing the highlighter to adhere better and last longer. Choose a primer that suits your skin type and apply a thin layer all over your face, paying extra attention to areas where you plan to apply the highlighter. Allow the primer to set for a few minutes before moving on to the next step.
Choosing the Right Shade
One of the most important aspects of applying cream highlighter is choosing the right shade that complements your skin tone. Highlighters come in various shades, from warm golden tones to cool pinks and icy whites. When selecting a shade, consider the undertones of your skin.
If you have warm undertones, opt for highlighters with golden or peachy hues. These shades will add a natural radiance to your skin without looking too frosty. On the other hand, if you have cool undertones, go for highlighters with pink or icy undertones to enhance your natural glow.
For neutral undertones, you have the flexibility to experiment with a variety of shades. Try to find a balance between warm and cool tones to achieve a subtle, yet stunning highlight. It can be helpful to swatch the highlighter shades on your wrist or jawline to see how they look against your skin before making a purchase.
Prepping the Skin
Before applying the cream highlighter, it's crucial to prep your skin properly to ensure a flawless application and finish. Start by applying a light layer of foundation or tinted moisturizer that matches your skin tone. This will provide a smooth canvas for the highlighter and ensure that the color payoff is even and natural-looking.
Next, use a concealer to hide any blemishes or dark circles under the eyes. Be sure to blend the concealer well into the skin for a seamless finish. If desired, set your foundation and concealer with a setting powder to prevent any creasing or smudging throughout the day.
Now it's time to apply the cream highlighter. Begin by picking up a small amount of product on your finger or a makeup brush. You can start with a small amount and build up the intensity as desired. Gently tap the highlighter onto the high points of your face, such as the cheekbones, brow bones, bridge of the nose, and cupid's bow.
Once applied, use your fingertips or a damp makeup sponge to blend the highlighter into your skin. This will help to achieve a seamless, natural-looking glow. Remember to blend carefully to ensure that there are no harsh lines or uneven patches.
- Start with clean and moisturized skin. Wash your face with a gentle cleanser and follow up with a lightweight moisturizer.
- Apply a primer to create a smooth base for makeup. Choose a primer that suits your skin type and allow it to set before proceeding.
- Choose a highlighter shade that complements your skin tone. Consider your undertones - warm, cool, or neutral - to determine the most flattering shade.
- Prep your skin by applying foundation or tinted moisturizer to create a smooth canvas for the highlighter.
- Conceal any blemishes or dark circles using a concealer and blend well for a seamless finish.
- Set your foundation and concealer with a setting powder if desired.
- Apply a small amount of cream highlighter on your finger or brush and tap onto the high points of your face.
- Blend the highlighter into your skin using your fingertips or a damp makeup sponge for a natural-looking finish.
Applying the Highlighter
When it comes to applying cream highlighter, there are a few key steps to follow in order to achieve a flawless, natural-looking glow. The first step is to choose the right shade of highlighter for your skin tone. It's essential to select a shade that complements your complexion, whether you have fair, medium, or dark skin.
To apply the highlighter, start by prepping your skin with a lightweight moisturizer. This will ensure that the product goes on smoothly and evenly. Then, using your fingers or a small brush, gently dab a small amount of highlighter onto the high points of your face. These areas include the cheekbones, brow bone, cupid's bow, and the bridge of your nose.
When applying the highlighter, remember that less is more. It's better to start with a small amount and build up the intensity gradually. This will prevent the product from looking too heavy or overdone. Additionally, avoid applying the highlighter to areas of your face with active breakouts or blemishes, as it may draw attention to them.
Blending Techniques
Once you've applied the highlighter, it's important to blend it seamlessly into your skin for a natural finish. There are a few blending techniques you can try to achieve a flawless result.
- Using clean fingers, gently tap and blend the highlighter into your skin using light pressure. This helps the product melt into your skin and creates a soft, diffused effect.
- If you prefer to use a brush, opt for a small, fluffy brush with synthetic bristles. Swirl the brush in small circular motions over the highlighter to blend it into your skin. Be sure to blend out any harsh lines or edges to create a seamless effect.
- In addition to fingers and brushes, you can also use a beauty sponge to blend cream highlighter. Dampen the sponge with water or a setting spray, then gently press and bounce it over the highlighter to blend it into your skin.
Regardless of the blending technique you prefer, always remember to blend the highlighter towards the edges of your face for a natural, luminous glow.
Enhancing Specific Features
Cream highlighter can be used to enhance specific features and bring attention to your best assets. By strategically applying the product, you can create the illusion of a more sculpted face or make certain areas of your face pop.
To accentuate your cheekbones, apply the highlighter directly on the highest point of the cheekbone and blend it upwards towards the temples. This will give your face a lifted appearance and add dimension to your bone structure.
If you want to make your eyes appear brighter and more awake, dab a small amount of highlighter on the inner corners of your eyes. This will instantly brighten up your eye area and make you look more refreshed.
To make your lips appear fuller and more defined, apply a tiny amount of highlighter to the cupid's bow. This will give the illusion of a more pronounced lip shape and make your lips look plump.
Setting the Highlighter
After you've applied and blended your cream highlighter, it's important to set it in place to ensure it lasts throughout the day. Setting the highlighter not only helps it stay put but also prevents it from settling into fine lines or creasing.
One way to set cream highlighter is by using a translucent powder. Take a small fluffy brush and lightly dust the powder over the areas where you applied the highlighter. This will help to lock it in place without dulling its luminosity.
Another option is to use a setting spray. After you've finished applying the highlighter, mist some setting spray onto your face to set the product. This will create a long-lasting, dewy finish that won't budge.
Remember to let the highlighter dry and set for a few minutes before continuing with the rest of your makeup routine. This will ensure that the product is fully settled and ready to be complemented by other makeup products.
Shop Cream Highlighters
Discover our top picks for you


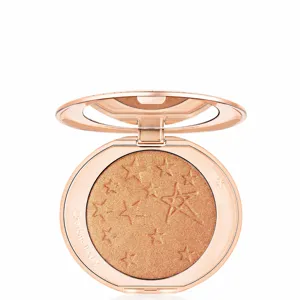


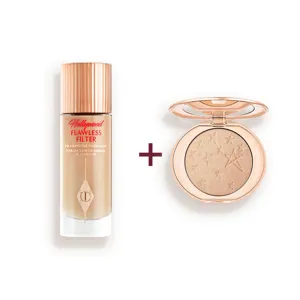
Hollywood Flawless Filter & Glow Glide Highlighter Duo
Find the Best Cream Highlighters for Your Type
More to Explore
Continue your beauty journey with these guides

How do you use a Sonic Face Cleanser?
"Unlocking the Secrets of Proper Sonic Face Cleanser Usage for a Flawless Skin"

What is self tanning mousse?
Unraveling the Secrets of Self Tanning Mousse: Your Ultimate Guide to a Sunless, Safe Glow

Are setting sprays worth it?
Are Setting Sprays Really Worth the Hype?
How to apply cream highlighter
Achieve a Luminous Glow: Mastering the Art of Cream Highlighter

Can matte lipstick cause dry lips?
Can Matte Lipstick Really Make Your Lips Dry? The Truth Behind the Myth.

Cream vs Powder Eyeshadow: Which Is Better?
The Great Debate: Cream vs. Powder Eyeshadows