
How to apply Liquid Blusher
Mastering the Art of Applying Liquid Blusher: Tips and Tricks for a Natural and Dewy Glow

Founder & Beauty Director · 6 June 2023
Preparation is Key
Applying liquid blusher can be a perplexing task, but the key to a flawless finish lies in preparation. First, ensure that your skin is clean and moisturised. This will provide a smooth base for the blusher to be applied on and make the application process easier. If you have oily skin, try using a mattifying primer to prevent the blusher from smudging or fading throughout the day.
Next, select the appropriate shade of blusher for your skin tone. It's important to choose a shade that complements your natural complexion. You don't want the blusher to look too dramatic or out of place. Remember, less is often more when it comes to liquid blushers. Start with a small amount and carefully build up the intensity as required.
Choosing the Right Shade
When it comes to liquid blusher, choosing the right shade can be a difficult task. With so many options available, it can be overwhelming to determine which colour will suit your skin tone best. It's important to consider a few factors before making a decision.
Firstly, think about the undertones in your skin. Are they warm or cool? This will impact which shades will work best for you. Warm skin tones often suit peachy and coral shades, whilst cooler skin tones may benefit from pink and berry shades. Additionally, consider the intensity of the colour you're choosing. If you have fair skin, a lighter shade may be more suitable, whilst darker skin tones may benefit from a more pigmented blush.
Applying to Cheeks
When it comes to applying liquid blusher to your cheeks, it can be quite perplexing to know where to start. The burst of colour from a liquid blusher is both exciting and daunting at the same time. The trick is to start with a small amount and build up the colour gradually. This way, you won't end up looking like a clown.
One method of applying liquid blusher is to dot a small amount onto the apples of the cheeks and blend outwards towards the hairline. This can help to create a natural-looking flush to the cheeks. However, some people prefer to apply the blusher in a straight line along the cheekbones and blend downwards towards the apples. This technique can help to contour and define the cheeks, especially when paired with a bronzer.
Blending Techniques
If you're new to using liquid blusher, you may be intimidated by the idea of blending it in – after all, it's a whole different beast than a powder blush. However, with a little practice and experimentation, you can master the art of blending liquid blush, giving yourself a natural glow that highlights your cheekbones and brings out the beauty of your face.
One technique you can use is the "dab and smudge" method. To do this, put a small dot of the blush on your cheek and then use your fingers or a makeup brush to blend it outward. Make sure you're blending in a circular motion, working from the centre of your cheek outward towards your hairline. Keep blending until the colour is evenly distributed and you're happy with the result.
Layering for Intensity
When it comes to achieving the perfect blush, layering is key. Liquid blusher can be notoriously tricky to apply, as it tends to dry quickly and can easily become too intense. To avoid this, start with a thin layer and gradually build up the colour to your desired intensity.
One technique is to first apply a lightweight foundation or tinted moisturiser, and then use a light touch to apply a small amount of liquid blush to the apples of the cheeks. Blend out with a stippling brush or your fingertips, and then repeat until you achieve the desired level of intensity. For a more dramatic effect, add a touch of highlighter to the tops of the cheekbones, but remember to blend well to avoid any harsh lines.
Fixing Mistakes
Applying liquid blusher can be a tricky task, and mistakes are bound to happen. It's important to remember that mistakes are not the end of the world, and they can be fixed with a little effort. One common mistake that people make is applying too much blusher. This can sometimes result in a clown-like appearance on the cheeks, which is definitely not the look you want to go for. If you find yourself in this situation, don't panic. Simply take a clean makeup sponge and gently dab away at the excess blusher until you find the desired shade.
Another mistake that people make is applying the blusher in the wrong place. This can make your face look uneven and out of balance. If you apply too much blusher to one cheek, you can fix the mistake by applying a matching shade to the other cheek. If you apply the blusher too low on the cheekbones, you can blend it upwards towards the temples to create a more natural look. The key to fixing mistakes is to take your time and be patient. Remember, makeup is supposed to be fun, so don't stress out too much about it. With a little practice and some trial and error, you'll be a pro at applying liquid blusher in no time.
Setting the Look
The key to a perfect application of liquid blush is first and foremost, setting the right look. You see, liquid blushes come in a variety of shades, each one catering to a certain skin tone and undertone. It's important to study your skin tone and pay attention to details like the color of your veins on your wrist, which will determine whether you have warm or cool undertones. Once you have noted and meticulously identified your undertones, you can then proceed to choose the right shade of liquid blush to complement your natural skin tone.
But that's not all; to set a natural look, it's important to start with a clean and moisturized face. Avoid products that form a barrier between your skin and the makeup, like very heavy moisturizers or oils. Apply a primer to set the foundation for the blush before starting with the liquid. You can also add concealer or foundation to cover up any skin blemishes or marks. Remember, the key to a natural look is not heavy coverage but a subtle glow that brings out the natural texture of your skin. Once you have set your canvas, you can then proceed to apply the liquid blush, starting with a small amount and spreading it across the cheekbones with a makeup sponge.
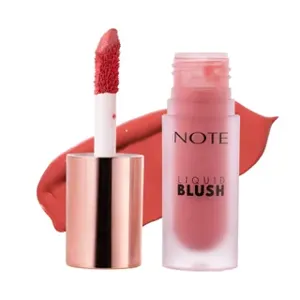
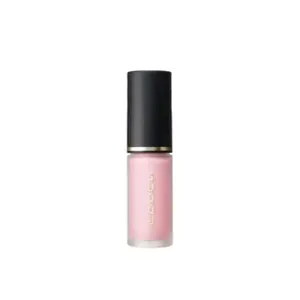
Shop Liquid Blushes
Discover our top picks for you


Find the Best Liquid Blushes for Your Type
More to Explore
Continue your beauty journey with these guides

Liquid blush hacks!
"Top Tips for Perfect Application of Liquid Blush!"

What type of skin suits liquid blush?
"Decoding the Perfect Skin Type for Liquid Blush Application"

Is liquid blusher better than powder blusher?
"Unveiling the Battle: Liquid Vs Powder Blusher – Which Reigns Superior?"

What is liquid blusher?
Exploring the World of Liquid Blusher: A Guide to its Uses and Benefits

What is Micellar Water?
Unveiling the Magic of Micellar Water: A Deep Dive into its Beauty Benefits
How to apply Liquid Blusher
Mastering the Art of Applying Liquid Blusher: Tips and Tricks for a Natural and Dewy Glow