
Liquid blush hacks!
"Top Tips for Perfect Application of Liquid Blush!"
12 January 2024
Understanding the Basic Application of Liquid Blush
Mastering the art of applying liquid blush flawlessly requires some insider knowledge. Here are a few simple steps that will enhance your beauty routine. The first step is always skin preparation. Before applying any kind of make-up, your skin needs to be clean and moisturised. Next, apply your preferred foundation, concealer or any other base you usually use.
Now, you're ready for liquid blush. Pour a small quantity on the palm of your hand - less is more. Use your index, middle and ring fingers to dabble lightly into the product. Apply first on the apples of your cheeks and then move upwards towards the temples. Always remember not to get close to the under-eye area; the objective is to mimic where your skin naturally flushes.
Develop a touch as delicate as a hummingbird while applying it. Blend it out using your fingers or a beauty sponge in a bouncing motion and not rubbing it in, this gives a natural seamless finish. Vary the intensity according to what looks best, and remember, it's much simpler to add more product than to remove an excess.
Choosing the Right Colour for Your Skin Tone
Picking the right colour for your skin tone could be a daunting task. However, with the right guidance, you can master it like a pro. If your skin has cool undertones — linked with blue or pink hues — you might want to aim for a blush in the rosy or lavender family. Those with warm undertones, associated with yellow or peachy hues, can try a more peach or coral shade. For neutral undertones, a wide array exists; you're particularly lucky as most shades will work.
Deeper skin tones can pull off vivid colours fabulously and look outstanding with colours featuring red, burgundy and tangerine hints. On lighter skins, pale pink, peach and soft berry hues typically enhance the natural skin tone subtly, offering a fresh-faced appearance.
How to Blend Liquid Blush for a Natural Look
Creating a natural appearance is the goal for many when applying liquid blush. Utilise a small amount to start with, depositing it on the apples of your cheek, then smoothly blend towards the temple. Using either your fingers or a damp beauty sponge is an excellent blending tool, simply tap it and keep it moving, don't drag or spread.
Try not to blend it out too much, though. You want to preserve some nice colour, only in a diffused way so that it resembles a natural rosy cheek. The key here is to appear as though the colour is coming from within your skin, not sitting on it. Build intensity slowly for more control of the blend.
Strategies for Long-Lasting Liquid Blush
Every make-up lover desires their application to stay put throughout the day. These tips may prove helpful. Firstly, prep your skin well by moisturising it as needed and applying a base for the make-up to hold on better. Layering your blush can also help to keep it in place; apply a thin layer, allow it to dry, and add another thin layer on top.
Some experts also advise setting liquid blush with a tiny bit of translucent powder. This technique can be particularly useful for those with oily skin. Another tip is to first apply the liquid blush, followed by a foundation that matches your skin tone. This way, the blush blends better with the rest of your makeup and tends to last longer.
Getting Creative: Using Liquid Blush on Lips and Eyes
The versatile nature of liquid blush allows you to apply it not just on the cheeks but also on the lips and eyelids. On the lips, you can use it as a stain, apply a thin layer for a subtle pop of colour. It can gently tint your lips, providing them with a natural-looking flush of colour. Just ensure to exfoliate and moisturise your lips beforehand for a nice, even application.
For the eyes, you can use it on the crease and blend it out, or as a base for other eyeshadows. This can give a monochromatic look that ties your makeup together. When used as a subtle shade, liquid blush can also provide an understated, natural shadowing to the eye area.
Correcting Mistakes When Using Liquid Blush
Mistakes happen to the best of us when applying make-up. However, the key is not to panic; there are ways to correct those mistakes. If you've applied too much blush, don't purposefully wipe it off - instead, use a makeup sponge to hop and blend the excess out gently.
Alternatively, some light concealer or foundation on top can lessen the intensity. If the blush appears blotchy, blend it out using a damp makeup sponge, or apply a minimal touch of foundation on top and blend. And if you've applied blush too close to your nose or too far from it, again use a touch of your foundation to cover it and redefine the area.
Remember, practice is the key to perfection. Over time, you will gain better control and mastery over the application process.
Advanced Techniques for Liquid Blush Application
Once you've mastered the basics, you can experiment with more advanced techniques. "Draping" is a method which involves applying the blush in a C-pattern from your cheekbones up to your temples and around the eye area, it's a great way to give structure and colour to your face in one easy step.
Another advanced method is mixing the blush with your foundation for an 'all over glow' effect. This can work wonderfully for days when you want minimal make-up but still want to look radiant and fresh-faced. And if you're looking to highlight your cheekbones, you can apply the blush just below the bone rather than on the apples of your cheeks. This gives the illusion of a lifted face and slimmer cheeks.
As a rule of thumb, always start with a small amount of product and then gradually build up until you reach your desired intensity. Lastly, make sure to blend blend blend – the key to making any blush look natural is good blending technique!
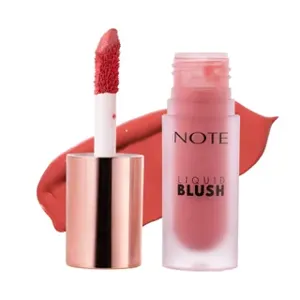
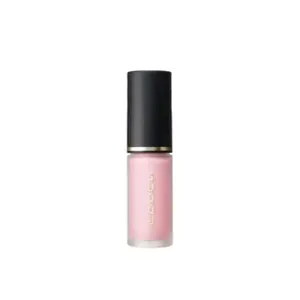
Shop Liquid Blushes
Discover our top picks for you


Find the Best Liquid Blushes for Your Type
More to Explore
Continue your beauty journey with these guides
Liquid blush hacks!
"Top Tips for Perfect Application of Liquid Blush!"

What type of skin suits liquid blush?
"Decoding the Perfect Skin Type for Liquid Blush Application"

Is liquid blusher better than powder blusher?
"Unveiling the Battle: Liquid Vs Powder Blusher – Which Reigns Superior?"

What is liquid blusher?
Exploring the World of Liquid Blusher: A Guide to its Uses and Benefits

Where to apply cream contour
"Master the Art of Contouring: The Ultimate Guide to Applying Cream Contour Like a Pro"

How to apply Liquid Blusher
Mastering the Art of Applying Liquid Blusher: Tips and Tricks for a Natural and Dewy Glow