
How to use lash tint
Mastering the Art of Lash Tinting: A Step-by-Step Guide for Gorgeous Lashes
14 July 2023
Preparation for Lash Tinting
Lash tinting is an effective way to enhance the appearance of your eyelashes by adding color and depth. Whether you want to achieve a natural or dramatic look, proper preparation is key to achieving beautiful results while ensuring safety. Before diving into the world of lash tinting, there are a few essential steps you should take.
- Step 1: Patch Test
- Step 2: Cleanse Your Lashes
- Step 3: Protect Your Skin
Before proceeding with lash tinting, it is crucial to perform a patch test to check for any potential allergic reactions. Apply a small amount of the tint mixture on a tiny area of your skin, such as behind your ear or on the inside of your elbow. Wait for 24 - 48 hours to see if any redness, itching, or irritation occurs. If no adverse reactions develop, then you are good to go.
Make sure your lashes are clean and free from any makeup, oils, or residue. Use a gentle oil-free cleanser or micellar water to cleanse your lashes thoroughly. This step ensures that the tint adheres to your lashes properly, ensuring maximum color payoff.
Apply a thin layer of petroleum jelly or a specialized barrier cream around the eye area to protect your skin from accidental staining. This protective barrier will prevent the tint from coming into direct contact with your skin and staining it.
Choosing the Right Tint Shade
Selecting the appropriate tint shade is essential to achieve the desired look and complement your natural features. Considering factors like your skin tone, hair color, and personal preference will help you make an informed decision.
- Step 1: Assess Your Skin Tone
- Step 2: Consider Your Hair Color
- Step 3: Personal Preference
Start by determining your skin undertone. If you have warm undertones, such as yellow or golden, opt for a brown or auburn tint for a natural look. If you have cool undertones, like pink or blue, consider a black or dark brown tint for a more striking effect. Neutral undertones can experiment with a wide array of shades.
Your hair color plays a vital role in determining the right tint shade. If you have light hair, a darker tint shade can create a beautiful contrast. On the other hand, if you have dark hair, a slightly lighter shade can add depth and dimension.
Ultimately, choose a tint shade that aligns with your personal style and preferences. Consider the intensity and boldness you wish to achieve. Experimenting with different shades allows you to find the perfect match that enhances your overall look.
Gathering the Necessary Supplies
Before beginning your lash tinting journey, ensure that you have all the necessary supplies readily available. Having everything prepared in advance will save you time and ensure a smooth application process.
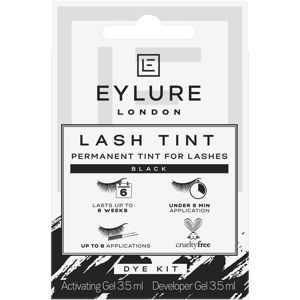
- Lash Tint Kit
- Protective Gloves
- Cotton Pads or Eye Patches
- Timer
- Makeup Remover or Gentle Cleanser
Invest in a high-quality lash tint kit that includes a tinting developer, tint color, mixing dish, and applicator brush. These kits are specially formulated for safe and efficient lash tinting.
Wear disposable gloves to protect your hands from potential staining. This precautionary measure keeps your hands clean and prevents any unwanted color transfer.
Place cotton pads or specialized eye patches under your eyes to catch any stray tint and protect the delicate skin around your eyes from accidental staining.
Set up a timer to ensure accurate application time. Different tints require different processing times, so make sure to follow the instructions provided with your chosen product.
Keep makeup remover or a gentle cleanser handy to help remove any excess tint on the skin in case of accidental staining.
Section 1: Applying the Tint Safely
When it comes to enhancing the appearance of your lashes, lash tinting can be a game-changer. By adding color to your lashes, you can achieve a more defined and dramatic look without the hassle of mascara. However, it is crucial to apply the tint safely to avoid any potential risks or complications.
Before you begin the tinting process, be sure to gather all the necessary supplies. You will need lash tint, a developer solution, a tint brush, and protective eye pads or petroleum jelly. It is also essential to perform a patch test at least 48 hours before applying the tint to ensure you do not have any adverse reactions.
- Step 1: Prepare the area by thoroughly cleansing the lashes and removing any traces of makeup or oils. This will ensure that the tint adheres properly.
- Step 2: Apply protective eye pads under the lower lashes or dab petroleum jelly along the lash line to prevent the tint from staining the skin.
- Step 3: Mix the lash tint and developer solution according to the manufacturer's instructions. Be sure to use the recommended ratio to achieve the desired color intensity.
- Step 4: Using a tint brush, carefully apply the tint to the lashes, starting from the base and working your way towards the tips. Take your time and make sure each lash is coated evenly.
- Step 5: Allow the tint to develop for the recommended time, usually around 10-15 minutes. Avoid touching or rubbing your eyes during this period.
- Step 6: After the development time has elapsed, gently remove the tint using a damp cotton pad or lint-free applicator. Ensure that all excess tint is removed to prevent any irritation or discomfort.
Section 2: Removing Excess Tint
While lash tinting can be a fantastic way to enhance your lashes' appearance, it is crucial to remove any excess tint to prevent any unwanted staining or irritation. Follow these simple steps to remove excess tint effectively:
- Step 1: Prepare a clean, damp cotton pad or lint-free applicator.
- Step 2: Gently press the cotton pad or applicator onto your lashes and carefully wipe away any excess tint. Be cautious not to rub or pull on the lashes.
- Step 3: If any tint remains, repeat the process using a fresh cotton pad or applicator until all excess tint has been removed.
- Step 4: Once you have removed the excess tint, rinse your eyes with lukewarm water to ensure that all traces of the tint are washed away.
Section 3: Aftercare for Lash Tinting
Proper aftercare is essential to maintain the longevity and vibrancy of your lash tint. Follow these tips to ensure that your tinted lashes stay beautiful and healthy:
- Don't wet your lashes for 24 hours: Avoid exposing your lashes to water or steam for at least 24 hours after tinting. This will allow the tint to fully set and ensure long-lasting results.
- Avoid oil-based products: Oil-based products can cause the tint to fade prematurely. Use oil-free makeup removers and avoid applying any oily substances near your lashes.
- Gently clean your lashes: Use a gentle, oil-free cleanser to clean your lashes daily. Avoid rubbing or pulling on the lashes, as this can cause them to fall out prematurely.
- Protect your lashes from the sun: Exposure to the sun's harmful UV rays can cause the tint to fade quickly. Use sunglasses or a hat to shield your lashes when spending time outdoors.
- Avoid excessive heat: High temperatures, such as saunas or hot showers, can cause the tint to fade faster. Try to limit your exposure to heat in the first 48 hours after tinting.
Section 4: Potential Risks and Considerations
While lash tinting can provide beautiful results, it is crucial to be aware of the potential risks and considerations before undergoing the procedure. Here are some important points to keep in mind:
- Allergic reactions: Some individuals may experience allergic reactions to the tint or developer solution. Performing a patch test at least 48 hours before tinting is essential to identify any allergies.
- Eye irritation: Improper application or contact with the tint can cause eye irritation. Take caution to avoid getting the tint into your eyes and ensure that it is applied by a trained professional if you are uncertain.
- Over tinting: It is vital not to leave the tint on for longer than the recommended time. Over tinting can lead to overly intense color or damage to the lashes.
- Professional application: If you are unsure about applying the tint yourself, consider visiting a professional lash technician who is experienced in lash tinting. They have the expertise to obtain optimal results while minimizing any potential risks.
- Pregnancy and breastfeeding: Pregnant or breastfeeding individuals should consult their healthcare provider before undergoing lash tinting to ensure it is safe for them and their baby.


Find the Best Lash Tints for Your Type
More to Explore
Continue your beauty journey with these guides

Will Micellar Water Remove Waterproof Mascara?
"Unlocking the Secrets: Can Micellar Water Really Take Off Waterproof Mascara?"
How to use lash tint
Mastering the Art of Lash Tinting: A Step-by-Step Guide for Gorgeous Lashes

What is a highlighter palette?
What You Need to Know About Highlighter Palettes: Adding Glow to Your Beauty Routine

Where to apply liquid foundation
Perfecting Your Liquid Foundation Application: Tips and Tricks for Flawless Coverage

How to apply gel eyeliner
Gel Eyeliner Application: Tips and Tricks for a Flawless Look

How to apply powder eyeshadow
Mastering the Art of Applying Powder Eyeshadow: Tips and Techniques