
How to apply gel eyeliner
Gel Eyeliner Application: Tips and Tricks for a Flawless Look
16 June 2023
Preparation
- Start with clean, dry eyelids. Use a gentle cleanser to wash your face and then pat your eyelids dry with a clean towel. This will prevent any oils or residue from interfering with the gel eyeliner's application.
- Apply an eye primer. This will create a smooth and even surface for the gel eyeliner to adhere to, and it will also help the eyeliner stay put throughout the day.
- Choose the right brush. A small, thin, angled brush is best for applying gel eyeliner. Make sure the bristles are smooth and not frayed, and test the brush on the back of your hand to make sure you have good control over it.
- Warm up the eyeliner. Gel eyeliner can be stiff and difficult to apply if it's too cold. To warm it up, use a hair dryer on a low setting and blow hot air over the container for a few seconds, or simply rub the container between your palms for a few seconds.
- Have a Q-tip or makeup remover handy. Mistakes happen, and it's important to have a backup plan when they do. Keep a Q-tip or some makeup remover nearby to quickly correct any mistakes or smudges.
By following these simple steps, you'll set yourself up for success when it comes to applying gel eyeliner.
Tools You Need
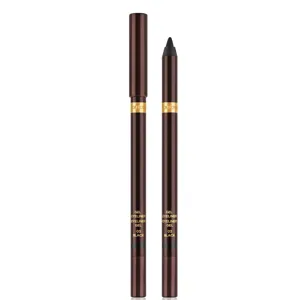
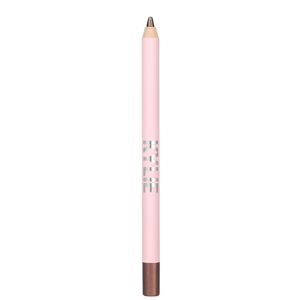
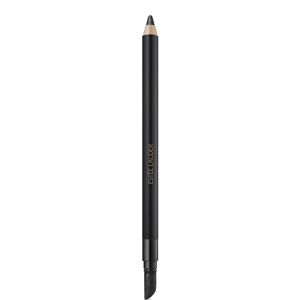
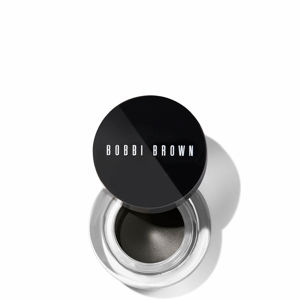
- Gel Eyeliner: There are many brands of gel eyeliner available, and they come in a range of colors. Choose a color that complements your skin tone and the color of your eyes.
- Brush: As mentioned earlier, a small, thin, angled brush is best for applying gel eyeliner. Make sure to test the brush beforehand to ensure you have good control over it.
- Eye Primer: A good eye primer will help the gel eyeliner stay put throughout the day. Look for a primer that is designed specifically for eyelids and is suitable for your skin type.
- Q-tip: Keep a few Q-tips or cotton swabs on hand to quickly correct any mistakes or smudges.
- Makeup Remover: It's always a good idea to have makeup remover on hand to fix any mistakes or to remove your makeup at the end of the day.
By having these tools ready and nearby, you'll ensure that you're ready to apply gel eyeliner with ease.
Techniques for Applying Gel Eyeliner
Now that you're prepared with clean eyelids and the right tools, it's time to apply the gel eyeliner. Follow these steps to achieve the perfect look:
- Dip the brush into the gel eyeliner and wipe off any excess on the edge of the container.
- Starting from the inner corner of your eye, gently and carefully draw a line as close to your lash line as possible. If you're having trouble keeping your hand steady, place your elbow on a flat surface and rest your hand against your cheek.
- If you're looking for a more dramatic look, draw a slightly thicker line by gradually increasing the width of the line towards the outer corner of your eye.
- For a winged eyeliner look, draw a line that extends outward from the outer corner of your eye, following the natural curve of your lower lash line. Then, connect the end of the line to the middle of your upper lash line and fill in the empty space.
- For a more subtle look, use a small brush to smudge the gel eyeliner slightly. This will create a softer line that's ideal for daytime wear.
- For the lower lash line, use a light hand to draw a thin line along the edge of your lower lashes. This will make your eyes appear more defined and open.
- Use a Q-tip or a small brush dipped in makeup remover to correct any mistakes or smudges.
Remember that practice makes perfect when it comes to applying gel eyeliner. If you don't get it right the first time, don't worry—simply remove the eyeliner and try again. With a little patience and practice, you'll soon be rocking the perfect gel eyeliner look.
Applying the Liner
Gel eyeliner is a popular choice for achieving a precise application with long-lasting wear. Here are some steps to help you apply gel eyeliner:
- Begin by selecting the right brush for your particular gel eyeliner. A fine, angled brush will help you achieve a clean, precise line.
- Next, prepare your eyes. Start with clean, moisturized skin, then apply your eye makeup base, such as eyeshadow primer, if desired.
- Dip your brush into the gel liner. Start by picking up a small amount of the product, then wipe the excess off the brush onto the side of your container. This will help you avoid applying too much product.
- Starting at the outer corner of your eye, begin to apply the gel liner using short, light strokes. Keep your wrist steady and guide the brush outward towards the outer corner of your eye for a winged look, or continue along your lash line for a classic look.
- Take your time and build up the product- it's always easier to add more than to remove excess. If you make a mistake, don't worry - simply use a cotton swab dipped in eye makeup remover to tidy up any errors.
- Once you've achieved your desired look, let the gel liner dry for a few minutes before making any other eye movements.
Correcting Mistakes
Even with the most practiced hands, mistakes can happen when applying gel eyeliner. Here's how to fix common application mishaps:
- To remove excess gel liner from an area that has gone astray, dip a clean cotton swab into a small amount of makeup remover. Use it to gently wipe away excess product.
- If you've applied too much liner, don't worry - just use a clean cotton swab to gently blend and soften the line. This will create a naturally faded appearance.
- If you experience smudging, gently pat your finger against the affected area to pick up the excess product. Do this as soon as possible to avoid the smudge setting in.
- If you notice that liner is transferring onto your eyelid, try applying an eyeshadow primer before your gel liner application. This will help reduce any oils on your eyelids and prevent transfer.
- If you have any irritation, swelling, or other issues resulting from the liner or its application, always consult with a medical professional or dermatologist. They can recommend specific treatments to help your condition.
Tips for Long-Lasting Wear
If you're looking for a gel eyeliner that will last all day, consider these application tips:
- Use an eyeshadow primer. This will help keep your gel liner from creasing or smudging throughout the day.
- When setting your gel liner, consider applying a matching eyeshadow on top of the liner. This will help set the gel liner in place and also create a beautiful finish.
- Avoid touching your eyes throughout the day. Not only can this irritate your eyes, but it can also smudge your eyeliner and make it less long-lasting.
- To further encourage long-lasting wear, consider waterproof or smudge-proof gel eyeliner formulas. These are designed to resist sweat, water, and other irritants, and will stay put for hours on end.
- Finally, remove your gel eyeliner gently but thoroughly at the end of the day. Use a makeup remover specifically designed for eye makeup, and avoid rubbing at your eyes excessively.
Removing Gel Eyeliner
Removing gel eyeliner at the end of the day is an important part of your makeup routine. Here are some tips:
- To begin removing gel eyeliner, start by dipping a cotton swab into eye makeup remover. Gently wipe the swab over your eyeliner, starting from the outer corner and working inward. Repeat until the eyeliner is completely removed.
- If you prefer, you can also use a micellar water or oil-based cleanser to remove your gel eyeliner. Simply apply a small amount to a cotton pad and gently wipe over your eyeliner, starting from the outer corner and working inward.
- Never use harsh scrubbing or rubbing motions to remove your gel eyeliner. This can irritate your eyes and also cause redness and inflammation. Be gentle and take your time to ensure that all of the product has been removed.
- If you have any difficulty removing your gel eyeliner, take a break and allow your eye area to rest before trying again. Sometimes your eyes can become sensitive from exposure to certain formulas, and this can limit your ability to remove the product effectively.
- Finally, once your gel eyeliner has been removed, be sure to follow up with a gentle cleanser and moisturizer to keep your eye area healthy and refreshed.


Find the Best Gel Eye Liners for Your Type
More to Explore
Continue your beauty journey with these guides

Does ChapStick Expire? Lip Balm Shelf Life Explained (2026)
Unmasking the Lifespan of Your Favorite Lip Balm

What age should I use Anti Ageing Creams
Unveiling the Right Time to Incorporate Anti-Ageing Creams into Your Skincare Routine

What's lip plumping gloss?
Unlock Fuller, Juicier Lips with Lip Plumping Gloss

What is liquid highlighter?
The Lowdown on Liquid Highlighter: What it is and How to Use it
How to apply gel eyeliner
Gel Eyeliner Application: Tips and Tricks for a Flawless Look

What is gel eyeliner?
Gel Eyeliner: Everything You Need to Know