How to apply Liquid Blusher
Get that Rosy Glow: The Ultimate Guide to Applying Liquid Blusher
11 June 2023
Identifying Your Skin Type
Before applying any makeup product, it is essential to identify your skin type. There are generally four types of skin: normal, dry, oily, and combination.
- Normal Skin - This skin type has a balance of oil and moisture and does not have any major skin issues.
- Dry Skin - Dry skin often feels tight and rough and can be prone to flaking and itching. This skin type lacks moisture and natural oils.
- Oily Skin - Oily skin tends to produce excessive amounts of oil, leading to shine and clogged pores. This skin type is susceptible to breakouts and acne.
- Combination Skin - Combination skin has a mix of dry and oily areas. The T-zone (forehead, nose, and chin) tends to be oily, while the cheeks are dry.
Knowing your skin type helps in choosing the right type of makeup product that suits your skin. The liquid blusher comes in various formulations, and selecting the right one can make all the difference.
If you have dry skin, go for a liquid blusher with a creamy texture, which will add a healthy glow to your skin. For oily skin, a water-based liquid blush would be best, which provides a matte finish and lasts longer on the skin.
Choosing the Right Shade
The next step in applying liquid blusher is choosing the right shade. Liquid blushers come in a wide range of colors like pink, coral, peach, and rose, among others.
The key to selecting the right shade is considering your skin tone. A general rule of thumb is to choose a shade that complements your undertones.
If you have cool undertones, go for a liquid blusher with a pink or rosy hue. For warm undertones, peach or coral shades work best. Neutral undertones can go for shades that have a mix of pink and peach hues.
Another tip to keep in mind is the intensity of the shade. If you're new to liquid blushers, start with sheer colors and gradually build up intensity.
Preparing Your Skin
Now that you have chosen the right type of liquid blusher and the right shade, it's time to prepare your skin. Prepping your skin ensures that your liquid blusher goes on smoothly and evenly.
- Cleanse your skin - Use a gentle cleanser to wash your face and remove any dirt or oil. Follow up with a toner to balance your skin's pH.
- Hydrate your skin - Apply moisturizer to your face to hydrate and nourish your skin. Wait for a few minutes for the moisturizer to absorb before applying makeup.
- Apply Primer - Primer helps the makeup to stay on for longer and also evens out your skin texture. Apply it all over your face or just in the areas where you will be applying the liquid blusher.
Once your skin is prepped and ready, it's time to apply the liquid blusher. Remember to start with a minimal amount and gradually build up color to avoid looking like a clown.
Using your fingers, a sponge, or a brush, apply the liquid blusher to the apples of your cheeks and blend it towards your temples. Take care not to apply too close to your nose to avoid looking flushed.
Finally, set your liquid blusher with a translucent powder to make it stay on for longer.
Applying the Blusher
When it comes to applying liquid blusher on your face, it's essential to start with clean and moisturized skin. Before applying the blush, ensure that you have applied your foundation and concealer. The reason why you want to apply your foundation first is that if you apply the blusher first, it can be difficult to blend over your foundation without it looking patchy or uneven.
Start by pumping a small amount of liquid blush on the back of your hand or a palette. It's important to remember that a little goes a long way with liquid blush, so always start with a small amount and gradually build up the color. You can use your fingers, a makeup sponge, or a brush to apply the blush to your face.
If you're using your fingers, gently dab the blush onto the apples of your cheeks and blend outwards towards your temples. Be sure to blend the edges of the blush so that there are no harsh lines left on your face.
If you're using a makeup sponge, dampen the sponge first before dipping it into the blush. This ensures that the blush spreads easily and looks natural. Use a stippling motion to apply the blush to your cheeks and blend it outwards.
Brushes can also be used to apply liquid blush. Most makeup artists prefer to use a fluffy brush and a stippling motion to apply the product. It's important to note that different brushes will give you different results, so it's essential to experiment to find what works best for you.
Blending Techniques
Blending is the key to perfecting your liquid blush application. Whether you're using your fingers, a sponge or a brush, it's important to spend time blending out the edges of the blush so that there are no harsh lines or patches left on your face.
A common technique used by makeup artists is to blend the blush in an upward and outward motion, towards the temples. This helps to create a natural-looking flush and gives your face a lifted appearance.
If you accidentally apply too much blush, don't panic. Simply take a clean sponge or brush and lightly blend out the edges of the blush until it looks more natural.
Settling the Blush
To ensure that your liquid blush stays in place all day, it's essential to set it with powder. After you have applied the blush, allow it to dry for a few seconds before using a loose translucent powder to set it. This will help to keep the blush in place and prevent it from transferring or rubbing off throughout the day.
You can use a fluffy brush to lightly dust the powder over your cheeks. Be sure to use a light hand and blend any excess powder outwards so that there are no visible lines left on your face.
Finishing Touches
Now that you have successfully applied and blended your liquid blush, it's time to finish off your look. Depending on your preferences, you can add a touch of highlighter to the tops of your cheekbones to make them pop.
You can also add a bit of bronzer to your temples and under your cheekbones to create more definition and to contour your face. Be sure to blend out any harsh lines to make it look natural.
Finally, set your entire face with a setting spray to ensure that your makeup stays in place all day. A setting spray will also help to give you a more natural, dewy finish, which is perfect for liquid blush.
With these simple steps, you can easily apply and create a natural-looking flush with liquid blush. Remember, practice makes perfect, so don't be afraid to experiment and find what works best for you!
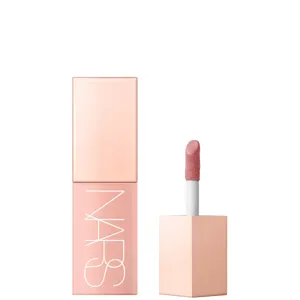
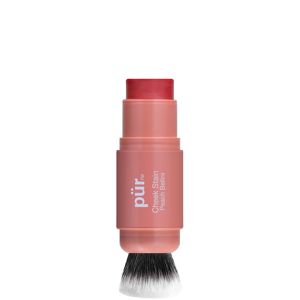
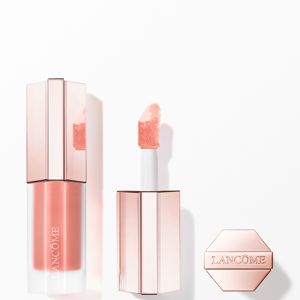
Find the Best Liquid Blushes for Your Type
More to Explore
Continue your beauty journey with these guides

Liquid blush hacks!
"Unlock Your Beauty Routine: Tips and Tricks for Applying Liquid Blush like a Pro!"

What type of skin suits liquid blush?
"Discover the Perfect Skin Type for Liquid Blush Application"

Is liquid blusher better than powder blusher?
"Exploring the Pros and Cons of Liquid and Powder Blushers: A Beauty Breakdown"

What is liquid blusher?
Unveiling the Magic of Liquid Blusher: Your Ultimate Guide

What is brow pomade?
The Lowdown on Brow Pomade: Everything You Need to Know
How to apply Liquid Blusher
Get that Rosy Glow: The Ultimate Guide to Applying Liquid Blusher