Our price tracker flags lash glue as one of the most overlooked cart add-ons that decides whether your false lashes look flawless or flop by lunchtime. Women will spend on lashes, liner, and mascara, then throw any old adhesive in the basket. That mismatch shows up later in returns and reviews when corners start to pop.
Across our merchant feed, we see lash adhesives sell out around prom, wedding, and holiday seasons—exactly when you need them to last. The right formula matters more than the fanciest strip. Glue sets the grip, the comfort, and the clean finish at the band. Get it right and the rest of your eye look gets easier.
You have real choices now: clear or dark, latex or latex-free, brush-tip or squeeze tube, fast-set or flexible hold. That choice should track your routine, your climate, and your lid chemistry. We’ll map those trade-offs, show where corners fail, and share fixes that work.
Context: What shoppers get wrong about lash glue
Search interest for “best lash glue” spikes every May and September in the US. Our data lines that up with wedding parties, school formals, and holiday photos. Adhesives move fast at Ulta and Target during those weeks, while Sephora and Nordstrom see more prestige brands get bundled in sets.
Latex-based strip adhesives dominated years ago. Today, latex-free formulas hold a growing share, pushed by sensitivity concerns and the rise of liner-style glues. We also track a steady stream of “corners lifting” complaints in reviews. Most cluster around two issues: oil-heavy skincare under the lash line and glues applied too wet.
Retailers sort lash glues by price tier as much as brand. You’ll find budget picks at Target, CVS, Walgreens, and Amazon. Prestige options sit at Sephora, Nordstrom, and Bluemercury. Value swings across channels, so check current offers. We compare prices across major retailers—add your short list to GlamGeek and we’ll alert you when stock or price shifts.
Season and location shift performance too. Humid Gulf Coast summers slow dry time and challenge hold. Dry mountain air sets glue faster but can make bands feel stiff. Cold Northeast winters add wind and watery eyes. You want a glue that fits your weather as much as your eyeliner look.
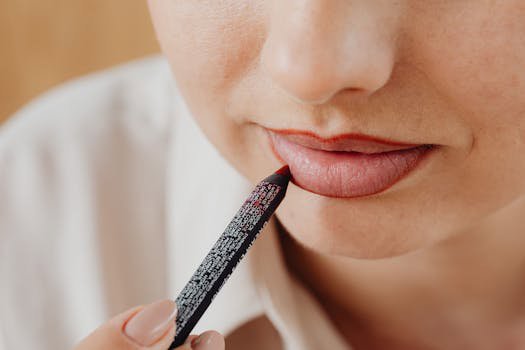
{{IMAGE:woman applying false lashes close-up}}Latex vs. latex-free: what’s inside your lash glue
Most strip lash glues use one of two systems. Latex-based formulas hinge on natural rubber latex. They stretch well, remove cleanly, and forgive a small mistake. They also trigger irritation for some women. If you’ve had a reaction to balloons or rubber gloves, avoid latex near your eyes.
Latex-free formulas use acrylates or similar polymers. They grip hard once the water or solvent flashes off. Brands market these as “waterproof” or “long-wear.” They often last longer through heat and tears than classic latex. Many come in brush-tip or liner-style packaging for precision.
Professional lash extension glues lean on cyanoacrylates—very different chemistry. Do not use extension glues for strip lashes at home. They cure with moisture, fume, and bond too aggressively for safe daily removal.
How to choose: reach for latex-free if you want stronger, more humidity-proof hold or if you have any suspicion of latex sensitivity. Stick with latex if your eyes run dry, you want a gentler removal, or you prefer a slightly more flexible feel on the band. If you wear contacts, lean latex-free and fragrance-free to cut risk of film or irritation.
Clear or dark: which shade suits your look
Clear adhesives dry transparent. They suit beginners, light daytime looks, and bare-lash-line styles. Clear formulas hide tiny placement errors and blend with fair lash lines. Many clear glues start milky and turn clear as they set. Wait for that color shift before placement to avoid sliding.
Dark adhesives include black pigment, often carbon black. They double as a thin eyeliner and give a denser root look. Dark suits smoky eyes, winged liner, and thicker bands. It hides the seam where the band meets liner. It also looks harsher on bare lids, so plan your makeup accordingly.
A third option has a “satin clear” finish that dries translucent with a soft sheen. That version works under soft brown liner looks. If you often smudge a pencil over your band, choose dark. If you never wear liner, go clear.
Rule of thumb: match your glue to your top-lash-line plan. No liner or a tightline only? Pick clear. Full liner or smoky look? Choose dark. If watery eyes ruin dark bands, keep a clear formula on hand for those days.
Brush-tip, squeeze tube, or liner: which format works best
Brush-tip tubes control dosage and placement. You can paint a micro line onto the band and stack a little extra on the corners. Many latex-free glues use this format. It suits most users and makes travel touch-ups simple.
Squeeze tubes cost less and last a long time, but they demand a steady hand. You risk blobs and strings if you squeeze while moving. If you love a squeeze tube, press a bit onto a palette or foil and dip a small brush. You’ll gain precision and waste less.
Liner-format glues paint directly onto the lash line. They feel fast and clean. The trade-off: they grab the skin rather than the band, so you must land the strip fast and straight. This format suits practiced hands and thin bands. If you struggle with straight placement, stick to band-only application until you build confidence.
Keep the neck clean on any format. Wipe off dried glue with a cotton swab and oil-free remover to prevent crusty caps. Store upright to maintain consistency. Cap tightly to reduce air exposure and extend shelf life.
Climate, oil, and chemistry: why corners lift
When corners lift, glue rarely acts alone. Oil and moisture interfere. So does timing. You need a tacky state, not a wet smear. Apply a thin, even coat and wait 30–45 seconds. Humid air needs more time. Dry air needs less. Touch the band with a tool; if it feels grabby, you’re ready.
Prep matters. Remove eye cream from the lid edge. Sweep the top lash line with an oil-free cleanser or a gentle toner. Blot dry. If your lids run oily, tap a whisper of eye-safe primer along the lash line and set with translucent powder. That thin barrier helps grip the band. You can find options in Face Toners and Face Primers that suit sensitive eyes.
Place extra glue at the inner and outer third of the band. Those points flex the most and meet skin with less natural lash support. If your eyes water, go latex-free for those corners even if you prefer latex center hold. You can mix formats sparingly for stubborn edges.
Finally, skip face oils and balms near the lash line on lash days. They migrate. Oil breaks down many adhesives, even the “waterproof” ones. Keep skincare rich on the orbital bone and light closer to the lashes.
Fit first: trim, curve, and map your band
No glue fixes a band that runs too long or too straight. Measure the lash against your eye and trim from the outer end. Keep the inner taper. If you prefer a lifted cat-eye, trim a bit more and angle the placement up at the tail.
Pre-curve the strip by wrapping it around a brush handle for a minute. A curved band seats faster and resists corner tension. Mark the start and end points on your lid with tiny dashes of pencil. That map guides your placement when glue turns tacky.
Thin bands stick faster and feel lighter. Thick bands look bold but need more glue and firmer pressure. If you fight corners every time, try half-lashes or accents. They skip the inner corner entirely and anchor near the outer third where skin moves less. Browse thinner-band options in False Lashes and compare styles before you commit.
Brands at Sephora and Ulta offer flexible bands that work with adaptable glues. You’ll find options from Tarte and Sephora Collection across retailers. Check our product pages, add the ones you like to your wishlist, and we’ll ping you when the price drops.
{{IMAGE:close-up of false lash band and lash glue applicator}}Application method: tools, timing, and anchor points
Use the right tool. A curved applicator or fine tweezers gives you control at the center and corners. If tools feel scary, use your fingers to set the middle and an applicator to clamp the edges. You can shop lash tools within Makeup Brushes & Applicators.
Apply glue to the band in a thin line. Add a dot more at each corner. Wait until the glue turns tacky. Land the center first. Anchor it to the peak of your natural lash line, not on your lashes. Then nudge the inner corner down and outward. Press in short taps with the tool. Repeat at the outer corner with a slight upward tilt.
Pinch the strip and your natural lashes together at three points: inner third, center, outer third. Use the tool’s flat side to press the band into the skin for 10–15 seconds. Let it set fully before blinking hard. If you see a gap under the band, wick a tiny bit of glue under that spot with the tip of the applicator and press again.
Finish the blend. Once dry, run a thin line of gel or pencil along the seam. Add a light coat of mascara to your natural lashes only, to mesh roots. You’ll find options to suit every finish in Mascaras. If you smudge, tap a pointed cotton swab in concealer to clean the edge. Products in Liquid & Cream Concealers work well for this.
Clear vs. dark in practice: common scenarios
For office days or video calls, choose clear. Use a thin strip or demi lash. Apply after a soft taupe shadow and tightline. Skip heavy liner. Clear vanishes and reduces the chance of a harsh seam.
For nights out, smoky eyes, or photos, choose dark. Paint a slim strip of dark glue on the band. Apply after your liner sets. The dark base masks tiny gaps and photographs well. If your lids get oily, run a trace of black pencil along the lash line first and set with shadow.
For hooded eyes, avoid thick dark bands at the inner corner. They press into the lid and lift. Use clear glue, place the inner corner a millimeter out from the deepest fold, and angle the tail up. If your eyes water, keep tissues and a mirror handy and do a gentle re-press while the glue finishes curing.
For monolids or straight lash lines, pre-curve the band longer. Use a stronger latex-free clear glue at the corners. Map the placement with dots and anchor the center first, then lift the outer third higher than you think. That lift counters natural droop.
Sensitive eyes and safe removal
If your eyes flare at new products, scan the INCI list. Seek “latex-free,” “formaldehyde-free,” and “fragrance-free.” Many brush-tip formulas fit this brief. Patch test on your inner arm before eye use. If you wear contacts, insert them after lash application to avoid glue vapor near the lens.
Removal should feel boring, not heroic. Saturate a cotton pad with your usual eye-safe remover. Hold it against the band for 20–30 seconds. The glue will soften. Peel the lash off from the outer corner toward the center. Avoid ripping from the inner corner, which pulls delicate skin.
Clean the band with remover to strip residual glue. Pinch off softened bits with clean fingers or tweezers. Store lashes in their tray to keep the curve. Never use hair glue, nail glue, or any cyanoacrylate-based adhesive for strips. They cure too hard and risk damage.
If irritation lingers after removal, rest your eyes for a few days. Switch to a latex-free clear formula next time. Consider a soothing, alcohol-free toner around the orbital bone only. Options in Face Toners can help calm without oil.
Budget, retailers, and when to buy
We see regular lash glue discounts at Ulta during 21 Days of Beauty and around Black Friday at most major retailers. Sephora’s Spring Savings Event also drops prices on select lash tools and adhesives from in-house and prestige brands. Target, CVS, and Walgreens run mix-and-match deals on lash brands several times a year.
Prestige brands cost more but often bundle minis or include brush-tip packaging. Mass brands deliver strong hold for less and stock widely at drugstores and Amazon. If you shop Amazon, buy from the brand’s official store or a trusted retailer listed on the brand’s site to avoid counterfeits.
Don’t over-buy. Adhesives thicken after opening. Replace your glue every few months if you use it often. If you wear falsies only on big nights, buy a mini. Add adhesives from Sephora Collection or Tarte to your GlamGeek wishlist. We track prices across Sephora, Ulta, Target, Amazon, and Nordstrom, and we’ll ping you when the price moves.
Value tip: store a clear and a dark version. You’ll cover every look and every lighting scenario. If you can only buy one, make it a clear latex-free brush-tip. It suits most eyes and plays well with liner on top.
Troubleshooting: stop corners lifting for good
Shorten the band by one cluster at the outer end. Long bands curl up at the tail. Pre-curve the strip so it hugs your eye shape. Apply a touch more glue at both corners and wait longer before placement.
Prep your skin. Remove oil along the lash line. Dab on a thin veil of eye-safe primer and set with powder. If your skin resists everything, paint a whisper of glue onto the skin where the corners will sit. Then coat the band. That double contact boosts grip.
Anchor in three taps. Center, inner, outer. Press and hold the corners for 10–15 seconds. Keep your chin lifted so lids don’t fold. If the inner corner fights you, start your lash a hair outside the tear duct. That millimeter saves tears and tugging.
Carry a tiny brush-tip adhesive for touch-ups. Dark bands can crust if you re-glue without cleaning. Use a cotton swab to lift old flakes, then add fresh glue. If you expect a long day, toss the mini in your bag for security.
Ingredient cues and label reading
Clear, latex-free glues often list water, acrylates copolymer, and film formers. Dark versions include black pigment. Latex-based glues list rubber latex and stabilizers. Look for “formaldehyde-free.” Today’s strip glues rarely add formaldehyde, but some labels still call it out.
If you see “fragrance” near the end of the list and your eyes sting often, pick a formula that skips it. If a glue burns on first contact, remove it and rinse. Switch brands or base chemistry. You can still get long wear with a gentler mix.
Remember: pro extension glues with cyanoacrylate don’t belong in a strip routine. They set fast, fume, and cling past comfort. Save those for licensed pros in a controlled setting.
From kit to camera: building a reliable lash routine
Plan the order. Eye makeup first, then lashes, then any cleanup and final liner. Keep liner formulas compatible. Oil-rich gel pots can slip glue, while set pencil and powder create a clean bed. If you love cream shadows, set the lash line with powder before glue.
Choose a lash that fits the day. Half-lashes and demis need less glue and almost never lift at the inner corner. Full strips bring drama but need mapping, trimming, and patient pressing. Start with the easy days and build up.
Blend the seam. A tightline and a thin swipe of liner after the lash dries create a pro finish. If clear glue leaves a tiny sheen, tap it with matte shadow. For dark glue, smudge a tiny bit of matching liner to soften any edge.
Keep a cleanup kit: cotton swabs, mini scissors, tweezers or applicator, brush-tip adhesive, and a small concealer. You can shop tools in Makeup Brushes & Applicators and find concealer textures in Liquid & Cream Concealers.
What this means: a quick decision guide
If you want the easiest start, pick a clear, latex-free, brush-tip glue. Trim a demi lash, pre-curve, and map your placement. Prep with a light primer on the lash line and set it. Apply a thin coat, wait for tack, and anchor center-then-corners. Finish with tightline and a light coat of mascara on natural lashes. You’ll find mascaras to suit length or volume in Mascaras.
If you live in a humid climate or expect tears, choose a latex-free formula and wait longer before placement. Load the corners with a touch more glue. Carry a mini for midday taps. For liner-heavy looks, keep a dark version on hand. If your lids get oily, add a trace of powder under the lash line after primer.
Sensitive eyes demand latex-free, fragrance-free glues and careful removal. Saturate the band with remover before peeling. Clean the strip, dry it flat, and store it. Limit use on back-to-back days if redness lingers. If you still struggle, switch lash style: thinner bands and half-lashes make everything easier.
Shop smart. Our tracker often spots adhesives discounted during Ulta 21 Days of Beauty and Sephora’s seasonal events. Target and drugstores run mix-and-match offers for lash brands on rotation. Add adhesives and lash tools from Sephora Collection or Tarte to your GlamGeek wishlist. We’ll alert you when the price dips or stock moves.
Before you go
Do you reach for clear or dark glue most days? Have corners ever lifted on a big night? Tell us what climate you live in and which formats you trust. We’ll use that feedback to refine our picks and flag better deals when they surface.