
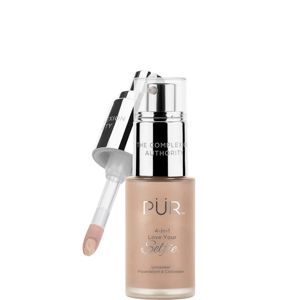
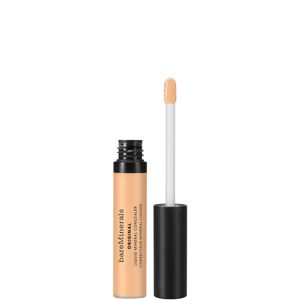
How to apply cream concealer
Tips and Tricks for Flawlessly Applying Cream Concealer
19 June 2023
Choosing the Right Shade
Applying cream concealer is an essential step in your makeup routine when you want to achieve a flawless and even complexion. However, if you don't get the right shade for your skin tone, it can end up looking caked or appear as if you have a white cast on your face. Here are some tips to help you choose the right shade:
- Know your skin tone: The first step to choosing the right shade of cream concealer is to know your skin tone. You can determine your skin tone by examining the veins in your wrist. If they appear blue or purple, you have a cool skin tone. If they appear green, you have a warm skin tone. If they appear both blue and green, you have a neutral skin tone.
- Match your concealer to your foundation: If you wear foundation, you should choose a cream concealer that matches your foundation. This will ensure that both products blend seamlessly together for a natural look.
- Test the concealer: It's always best to test the concealer before purchasing it. Try the concealer on your jawline or the side of your face to see if it matches your skin tone. Make sure to step outdoors to see how the concealer looks in natural light.
- Consider your under-eye area: If you're using a cream concealer to cover up dark circles, choose a shade that's one to two shades lighter than your skin tone. Avoid using a concealer that's too light, as it can make your under-eye area appear ashy or gray.
- Keep in mind your skin concerns: If you have redness or discoloration on your skin, consider using a green or purple color corrector before applying your cream concealer. Green will neutralize redness, while purple will brighten dull skin.
Prepping Your Skin
Prepping your skin is an essential step to ensure that your cream concealer applies smoothly and stays in place all day. Here are some tips on how to prep your skin:
- Cleanse your skin: Before applying any makeup, make sure to cleanse your skin thoroughly. Use a gentle cleanser that's suitable for your skin type.
- Moisturize your skin: After cleansing, apply a moisturizer to your skin. This will help hydrate your skin and create a smooth base for your cream concealer.
- Apply eye cream: If you're using a cream concealer to cover up dark circles, apply an eye cream before applying your concealer. Eye cream will help hydrate the delicate skin under your eyes and prevent your concealer from creasing.
- Use a primer: Using a primer before applying your cream concealer can help it adhere to your skin better and last longer. Choose a primer that's suitable for your skin type and apply it to your face and under-eye area.
- Set your concealer: After applying your cream concealer, set it with a translucent powder to prevent it from creasing or fading throughout the day.
Applying Primer
Applying cream concealer with the right technique can make a huge difference in how it looks and stays on your skin. Here are some tips on how to apply primer for a flawless finish:
- Apply with a brush or sponge: The type of tool you use to apply your cream concealer is important. If you want a more natural finish, use a damp sponge to apply the concealer. If you prefer more coverage, use a small brush to apply the concealer directly to the areas you want to cover.
- Use tapping motions: When applying your cream concealer, use tapping motions to blend it into your skin. This will help it adhere better and prevent it from looking caked or too heavy.
- Build up coverage: If you need more coverage, don't apply too much concealer at once. Instead, build up the coverage in thin layers, tapping each layer into your skin until you achieve the desired coverage.
- Blend with a clean brush: After applying your cream concealer, blend the edges of the concealer with a clean brush to ensure a seamless finish.
- Set with powder: Finally, after applying your concealer, set it with a translucent powder to prevent it from creasing or fading throughout the day.
Applying Concealer
When it comes to applying cream concealer, it's important to start with a clean, moisturized face. Begin by applying a small amount of primer to help the concealer adhere properly and last longer. Next, dot a small amount of concealer onto the area you wish to cover up, whether it be under-eye circles, blemishes, or redness. It's important to use a small amount of product, as using too much can result in a cakey, unnatural look.
For under-eye circles, apply the concealer in a V shape, with the point of the V pointing downward towards your cheekbones. This will help to brighten up your under-eye area and bring more light to your face. If you're covering up blemishes or redness, apply the concealer directly onto the spot and blend outwards with a small, flat brush.
You can also use your fingers to blend the concealer, but be sure to use a light tapping motion rather than rubbing the product in. This will ensure that the product stays in place while still blending seamlessly into your skin.
Blending Techniques
Now that you've applied your concealer, it's time to blend it in so that it looks natural and seamless. Using a small, fluffy brush or a damp beauty sponge, gently blend the edges of the concealer into your skin to avoid any harsh lines or creases.
If you're using a brush, try using small circular motions to buff the concealer into your skin for a more flawless finish. Alternatively, a damp beauty sponge can be used to bounce the product into your skin for a more natural look. Whatever tool you choose, make sure it's clean and free of any leftover product from previous uses.
If you still have trouble getting your concealer to blend seamlessly, try using a small amount of setting powder to help the product stay in place and prevent it from creasing.
Setting Your Concealer
After you've blended your concealer in, it's important to set it to ensure that it stays in place all day. Using a small brush or a beauty sponge, gently apply a small amount of setting powder onto the area you've concealed. Be sure not to use too much, as this can cause creasing and make the product look cakey.
If you're using a beauty sponge, lightly bounce the product onto your skin to prevent any excess powder from settling into fine lines or creases. You can also use a setting spray if you prefer a more dewy finish, but be sure to let it dry completely before moving on to the next step.
If you're applying concealer to your under-eye area, be sure to use a setting powder that's specifically designed for that area. These powders are finely milled and won't settle into fine lines or accentuate wrinkles.
Finishing Touches
Once you've applied and set your concealer, it's time for the finishing touches. If you've applied concealer to your under-eye area, try using a brightening powder or highlighter to further enhance that area and give you a more well-rested appearance.
If you're using a powder highlighter, apply it lightly with a small brush to the tops of your cheekbones, bridge of the nose, and cupid's bow. For a more natural glow, try using a cream highlighter that can be blended seamlessly into your skin.
Finally, if you're using concealer to cover up blemishes or redness, try using a powder blush or bronzer to add some color and dimension back into your face. Apply lightly to the apples of your cheeks and blend outwards towards your temples to achieve a natural, flushed look.
Remember, when it comes to applying cream concealer, less is more. Start with a small amount of product and gradually build up to achieve your desired coverage. And always be sure to blend, blend, blend to avoid any harsh lines or unnatural-looking makeup.


Find the Best Liquid & Cream Concealers for Your Type
More to Explore
Continue your beauty journey with these guides

What is the difference between a day and night moisturizer?
"Unveiling the Mysteries: Day vs Night Moisturisers Explained"

Cream vs Liquid Concealer: Which Covers Better?
Cream vs. Liquid Concealer: Which One Reigns Supreme in the World of Beauty?
How to apply cream concealer
Tips and Tricks for Flawlessly Applying Cream Concealer

Where to apply pencil eye liner
Mastering the Art of Applying Pencil Eye Liner: Tips and Tricks.

Where to apply powder bronzer
"Mastering the Art of Bronzer: Expert Tips on Perfect Placement"
Liquid vs Stick Concealer: Which Should You Use?
Which type of concealer reigns supreme: liquid or stick?