Strip lashes can look expensive even when they cost next to nothing. Our price tracker shows a spike in lash buys across Australian retailers during party season and wedding months. Demand soars, adhesives sell out, and the panic sets in right before makeup time.
Here’s the good news. You can get a clean, secure lash in less than five minutes with the right prep and a steady sequence. No drama. No glue blobs. No “stuck to the lid” disasters.
Why false lashes stump beginners (and why that’s solvable)
Most first-timers struggle at two pinch points: band fit and glue timing. We see this in reviews across our lash category. Short bands pop up at the inner corner. Long bands poke the outer eye. Both problems trace back to trimming and tackiness, not talent.
The market hasn’t helped. In 2020, long faux-mink styles dominated feeds. In 2022 and 2023, half-lashes and clusters took off. In 2024, lighter fibres and clear bands gained share. The choice now looks endless, which can stall a beginner before step one. We rate that variety, but it needs a filter.
Australia adds two more variables. Heat and humidity test adhesives. SPF-rich bases can slip under a lash band. Our take: pick heat-stable glue, control oil on the lid, and let the adhesive reach the right tack before placement. You’ll beat both the climate and the learning curve.
Across Mecca, Sephora Australia, MYER, Priceline, Chemist Warehouse and Adore Beauty, we see price gaps on popular lash multipacks and glues week to week. If you add favourites to your GlamGeek wishlist, we’ll flag drops so you can top up without paying a party-season premium.
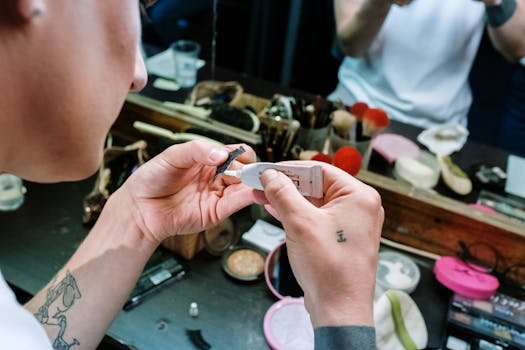
{{IMAGE:woman applying false lashes close-up}}Start here: choose the right lash style for your eye shape and day
Not all lashes suit a first go. Thin, flexible bands forgive wobbles. Clear bands hide micro-gaps. Shorter lengths marry with your natural lashes faster and need less mascara to blend. That’s why we nudge beginners toward natural and light-volume strips, or half-lashes that sit on the outer third.
Map to your eye shape and the look you want:
- Almond eyes: Almost anything works. Try a light criss-cross for softness. A thin clear band helps while you learn placement.
- Round eyes: Choose a winged or half-lash to elongate the outer corners. Keep inner length modest so the eye doesn’t look startled.
- Hooded eyes: A short band with more lift in the centre or outer third stops transfer onto the lid. Avoid dense inner corners.
- Monolids: A steady curl and medium density read best on camera. A clear band will sit closer to the lash line.
- Deep-set eyes: Lashes with a stronger curl avoid shadowing the lid. Skip thick bands until you’re confident.
Material and band matter. Faux silk and lighter synthetic fibres hold curl and feel lighter than older faux-mink styles. A knot-free clear band looks softer and bends easier. Heavier cotton bands stay put once learned, but they punish mistakes. Save them for week two.
Brands across Sephora Collection and Morphe stock beginner-friendly clear-band options. Browse the full False Lashes category on GlamGeek, compare styles, and add a couple to your wishlist. We’ll ping you when they drop in price at AU retailers.
Measure and trim: the two-minute step that prevents lifting
Never place a strip straight from the tray. Measure it against your eye first. Hold the lash with tweezers and rest it on your natural lash line without glue. Align the inner end about 1–2 mm from your tear duct. Mark where the outer end meets your lash line.
Trim from the outer edge only. Most strips taper shorter toward the inner corner. If you snip from the inside, you cut off that shorter section and create a harsh block where you need it softest. Cut in small bites—one cluster at a time—then re-measure. Angle your scissors slightly upward to avoid a blunt shelf at the end.
Check the curl and band bend. Pre-curve the lash by wrapping it around a brush handle for 30 seconds while you set up your mirror. This quick curl trains the band to sit flush to the eye and reduces popping at the corners.
If the outer end still pokes once trimmed, slope the very last knot at a diagonal rather than a straight cut. That tiny bevel melts the seam into your natural lashes. You can also convert a full strip into a half-lash by trimming it at the midpoint. Keep the outer half for a fast winged lift that rarely lifts.
Prep the canvas: clean lids, prime smart, and curl first
Glue hates oil. Sunscreen, eye cream, and dewy concealers all move under heat. That matters in most of Australia for much of the year. Clean the lid and lash line with micellar water or a gentle cleanser. Dry fully. If you wear skincare under makeup, keep richer products above the crease.
Use a tiny amount of primer on the lid only if you need grip. A silicone-free option works best near the lash line. Tap on a thin layer and set the area with a translucent powder. You can also map a faint line with a pencil to guide placement. Soft brown works for day. Black hides the band best at night.
Curl your natural lashes before glue. One squeeze at the base and one in the middle lifts the roots and gives the strip a shelf to sit on. Brush through with a spoolie. Apply a light coat of mascara, then let it dry. A dry, defined base blends with the strip faster. Heavy mascara before a soft strip can weigh the look down, so keep it light.
If you need to tidy the under-eye or cover redness after lash placement, keep your Liquid & Cream Concealers ready. Dot and blend after the lash sets so you don’t tug the band while it’s wet.
Glue and timing: the small wait that changes everything
Most mishaps happen here. Beginners either lay the band while the glue is wet, or they wait so long that it dries on the band before it meets the skin. Aim for tacky, not wet. Think soft marshmallow, not syrup.
How to load the band:
- Apply a thin, even line along the band, end to end. Add a micro-dot at the inner and outer corners.
- Use the tube nozzle, a liner brush, or a toothpick for control. Keep glue off the lash hairs.
- Wave the lash or set it aside for 25–40 seconds. In humid conditions, wait a little longer. In dry air, a little less.
Choose glue to suit your eyes and the climate. Clear glue dries less obvious if you wobble. Black glue doubles as liner and hides tiny gaps, but it stamps if you blink. Latex-free formulas suit sensitive eyes and perform better in heat for many users. If your eyes water, look for a water-resistant claim. Avoid hair glue. It is not eye-safe.
While you wait for tack, position your mirror below your face so you look down, not straight ahead. This opens the lid and flattens the plane, so the band meets the skin, not just the lash tips. Keep elbows supported on a table to steady your hands.
{{IMAGE:close-up of woman trimming strip lashes with small scissors}}Placement: anchor, then perfect the inner and outer corners
Hold the lash with tweezers or an applicator in the centre of the band. Lower it onto your lash line so it kisses the skin right above your natural roots. Anchor the centre first. Don’t close your eye; the lid shifts and can kick the inner corner up.
Next, press the inner corner down with the tip of your tweezers. Keep the band 1–2 mm away from the tear duct. If you place it too close, it will rub and lift. Finally, seat the outer corner. Use the back of the tweezers to roll the band toward the skin if it resists. Small presses beat one big shove.
Check the top angle. If the band sits on the lash hairs instead of the lid, slide the strip down a fraction while the glue is still tacky. If you miss, lift the strip off, add a touch more glue to the ends, wait 20 seconds, and try again. A thin band forgives this. A heavy band does not.
For hooded or deep-set eyes, try the “half-open” trick. Keep your gaze down, but look slightly up through your lashes. This protects the upper lid from stamping glue and sets the band closer to the roots.
Blend and finish: pinch, line, and barely-there mascara
Once the band sits flush, pinch your natural lashes and the strip together. Use a silicone-tipped applicator or the pads of your fingers. Press and release along the lash line. This step creates one fan instead of two layers that fight each other.
Now hide the seam. Tightline the upper waterline with a soft black or deep brown pencil. Draw a thin line along the band if you need it. A powder shadow from your go-to Eye Shadow Palettes softens the edge in seconds. Tap, don’t drag. If you smudge, lift the error with a pointed cotton bud and a touch of micellar water, then pat dry.
Add a whisper of mascara to marry the strip with your real lashes. Focus at the base. Avoid the tips; you’ll clump the wispy ends and shorten the look. If you chose a very light strip, skip mascara entirely. The curl will do the work.
Keep a clean spoolie on hand. Brush through from underneath if the lash looks heavy. A few upward strokes fluff synthetic fibres and bring life back after liner or powder.
Beginner pitfalls and quick fixes
Inner corner lift: You likely cut too short or set too close to the tear duct. Next time, leave that 1–2 mm gap. For now, dot a micro amount of glue under the lifted section with a toothpick. Wait 10 seconds, press down, and hold for 15 seconds.
Outer corner poke: The band is too long or cut blunt. Bevel the last knot with tiny angled snips. Add a dab of glue to the very end and re-seat it. If your eyes water outdoors, switch to a half-lash for windier days.
Band shows in photos: You didn’t line the waterline, or the band sits above the skin on lash hairs. Tightline, then pinch again to marry the strip with your lashes. Choose clear bands until your muscle memory builds.
Glue everywhere: You applied too much or placed it too wet. Load thinner next time. Wait longer. Keep a pointed cotton bud and a little concealer handy. Tap concealer where you lifted pigment with cleanup. Our Liquid & Cream Concealers category has plenty of precise pens and wands that work for this job.
Heaviness or droop: The style is too dense or too long for your lid space. Downsize to a lighter strip, or try a half-lash. Lighter fibres from lines like Sephora Collection often solve this without losing impact.
Removal, cleaning, and safe reuse
Take lashes off before cleanser hits your face. Soak a cotton bud in micellar water and trace along the band to soften the glue. Peel from the outer corner toward the centre. Don’t rip. If it tugs, add more micellar and wait a few seconds. Your lids are delicate skin. Treat them that way.
Once the lash is off, remove glue residue from the band with tweezers or fingers. Roll it away gently. Don’t soak the lash in oil if you want to keep the curl and shape. A light wipe with micellar on the band is enough. Let the lashes dry on the tray, then store them in their case to preserve curve and keep dust off.
Most light strips last 5–10 wears if you avoid mascara on the fibres and clean the band each time. Heavier, denser lashes may stretch or shed sooner. Replace at the first sign of fray at the inner corner or a wobble you can’t correct with glue.
If you wear contact lenses or have sensitive eyes, choose latex-free glue and avoid fragranced removers. Patch test new adhesives on the inner arm first. Australia’s summer heat can raise the chance of irritation when products sit longer on warm skin.
Climate control: make lashes last through heat, humidity, and long events
Warm weather changes your prep. SPF and eye cream can break adhesion. Place hydrating products above the crease and keep the lash line matte. A small amount of a long-wear eye base on the lid helps in humidity. Set with a touch of powder where the band will sit.
Plan for sweat and time. If you’ll be outdoors at a wedding or racing event, choose a lighter strip with a clear band and a heat-stable, water-resistant glue. A black glue looks sharp but can stamp when the air feels heavy. Clear glue forgives a blink.
Wind matters too. On breezy days, swap a full strip for a half-lash. You’ll get lift at the outer corner without risking inner-corner lift. Pack a mini adhesive in your bag. Dab and press in the powder room if a corner pops up after hours of wear.
Set your eye look before lashes. Cream shadows can stay tacky in humidity. If you love a cream base, lock it down with a matching powder from one of your Eye Shadow Palettes. Then apply your strip. Less slip, more hold.
Tools that make application simpler
You don’t need a pro kit. A few well-chosen tools make a big difference. A lash applicator gives you a wide grip on the band and shields fingers from glue. Pointed tweezers help with inner corners. A fine scissors trims with control. A handheld mirror lets you look down and see the whole lash line.
Pick an adhesive that suits your skin and setting. A brush-tip tube applies a thinner, more precise line. Squeeze tubes work too, but they can flood the band until you practice. Keep cotton buds, a spoolie, and a soft pencil liner on the table before you start. Setup trims minutes off your routine.
If you want an all-in-one starter set, browse multipacks and tool bundles in False Lashes. We also track applicators and curlers under Makeup Brushes & Applicators. Add your picks to a GlamGeek wishlist and we’ll notify you when they drop at Priceline, Chemist Warehouse, or Sephora Australia.
Before big events, practice once with a light lash at home. Time the glue. Measure the cut. Test your liner match. One dry run builds muscle memory faster than any tip sheet.
How to layer lashes or switch to clusters when you’re ready
After a few wears, you may want more custom control. Layer a very light half-lash over a natural full strip for extra outer lift. Prep both bands and set the full strip first. Wait until the glue sets, then add the half-lash at the outer third with a touch of fresh adhesive.
Curious about clusters? They suit beginners who struggle with full bands. Place three to five small clusters along the outer third for a weekend look. Load the knot with a tiny dot of glue, wait for tack, then seat each cluster 1 mm from the skin to avoid a harsh ridge. Clusters hide gaps on sparse lash lines and feel lighter than a full strip.
Keep balance in mind. Shorter lengths toward the centre, longer at the outer edge, usually flatter most eye shapes. If you wear glasses, aim for shorter curls to prevent brush-up against lenses. If you need budge-proof for a long event, clusters allow you to re-glue one section if it lifts without removing the entire look.
You’ll find cluster kits and mixed-length packs in the False Lashes category. Filter by band type and style, compare stock from Mecca and Sephora Australia, and lean on reviews to see which fibres feel softest on the eye.
What this means if you’re starting from scratch
False lashes stop feeling fiddly when you shrink the variables. Pick a light, clear-band style. Measure and trim from the outer end. Keep the lash line clean and matte. Apply a thin glue layer, then wait for tack. Anchor centre, then inner and outer corners. Pinch, line, and done.
Australia’s climate rewards good prep. Sweat and SPF live near the lash line most of the year. Set your lid and choose latex-free or water-resistant glue if you’re prone to tears or heat. Carry a mini adhesive for late-day touch-ups. Aim for comfort and fit first; drama can follow later.
Use GlamGeek to cut noise and cost. Our comparison pulls in live listings from major AU retailers, so you can spot multipack deals and pick up tools without overpaying. Add the lashes you want to try, and we’ll alert you when they drop. It turns a trial-and-error process into a simple checklist.
Ready to practice?
Grab a light strip, a precise glue, and an applicator. Set a mirror below your face. Follow the sequence once on each eye. You’ll clock the timing by the second run. If you want a softer, everyday finish, try a half-lash. For more definition, finish with a light coat from your favourite pick in Mascaras and a touch of liner.
What’s your current stumbling block—trim length, glue timing, or inner-corner lift? Tell us what went wrong last time, then add two beginner styles from False Lashes to your GlamGeek wishlist. We’ll flag a price dip, you’ll practice on a budget, and next time out your lashes will stay put until you say otherwise.