Mini sizes cost more per millilitre. Our price tracker shows consistent mark-ups on minis across Australian retailers. Yet in summer, the right mini can save your face, your hair, and your patience.
Formats matter more than volume in Aussie heat. Sticks, gels and powders beat glass droppers and runny creams on a 38°C day. We see women choosing performance packaging over prestige when temperatures spike. That tells the real story.
Here’s a carry-on edit that survives the cabin, the surf, and the sticky walk from hotel to dinner. No suitcase-only glass bombs. No gimmicky sets that stall at the first sweat drop.
We’ve watched mini sales rise with each heatwave since 2019. Search interest for SPF sticks and tubing mascaras jumps every January. Retailers stack front pages with travel icons from late spring. They do that because hot-weather minis actually move.
Price patterns give more clues. Multi-use sticks hold value better than single-purpose minis. Sunscreen sticks and sprays rank high for repurchase. Mini cleansers with oil phases also hold their ground. Customers buy formats that tackle sweat, salt and SPF, then come back for more.
Local climate also sets the brief. Darwin’s humidity fries hold and invites smudge. Perth’s dry heat dehydrates and dulls. Sydney and Brisbane swing between both. One travel lineup can’t serve every state, but a heat-proof core can. Build that, then flex for location.
We source data from Mecca, Sephora Australia, Priceline, Chemist Warehouse, Adore Beauty and MYER. Stock moves fast at peak holiday times. If a specific mini vanishes, a format twin usually exists. Add it to your GlamGeek wishlist and we’ll ping you when it returns or drops in price.
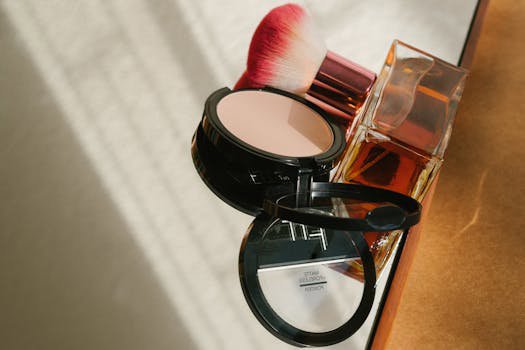
{{IMAGE:woman applying sunscreen at the beach Australia}}SPF that actually holds up in real heat
Sunscreen makes or breaks a travel routine here. Our data tags SPF as the single most repurchased mini category in summer. For carry-on and reapplication, solid sticks, clear gels and light lotions work best.
Look for broad-spectrum SPF50+ and water resistance. Shiseido Clear Suncare Stick SPF50+ sets the standard for portability. You can swipe without a mirror and layer over makeup. Clear gels also shine. They grip well and avoid the heavy film that slides in humidity.
Powder SPF earns a place for top-ups only. It mattifies a T-zone and adds a safety net between swims. Don’t use it as your sole protection. Reapply a lotion or stick after sweat, towelling or a dip. Avoid decanting sunscreen into untested bottles. Stability and even coverage matter too much to gamble.
Local heroes deserve a look. Australian chemists stock many SPF50+ minis that pass security. Seek formulas with film formers like acrylates copolymer. They hold protection on skin in heat. Fragrance-free options help if your skin flushes in sun.
Pack one dedicated face SPF and one body option. Keep both under 100 ml for carry-on. Slide the stick in your handbag for beach runs and hikes. Then use a lotion before long sun windows. For a smart browse, start with our roundup of SPF Protection Products and add your picks to a GlamGeek wishlist. We’ll watch prices across local retailers so you don’t have to.
Skincare that hydrates and calms on the go
Air-con and heat create a dehydration loop. Skin loses water in dry cabins and again in afternoon sun. Travel minis should repair the barrier and trap moisture without grease. We rate a short stack: a gentle antioxidant, a humectant-rich hydrator, and a light gel-cream.
Keep acids and harsh actives at home unless your skin tolerates them well. You can’t bargain with a sunburn. Look for panthenol, ectoin, glycerin and hyaluronic acid. Niacinamide helps calm blotchiness and supports barrier function. You don’t need the highest percentage. You need a formula that sits under SPF and stays put.
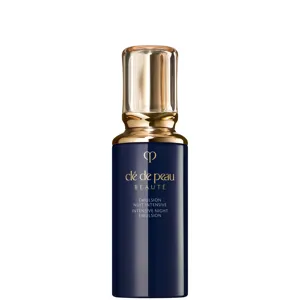
Reliable mini options stay popular year after year. Clinique Moisture Surge minis pack humectants in a gel texture. They layer cleanly under sunscreen. Estée Lauder Advanced Night Repair travel sizes remain a safe bet for night repair when your skin looks wind-beaten. If you prefer a plant-forward option, small tubes from pharmacy brands do a strong job at a lower outlay.
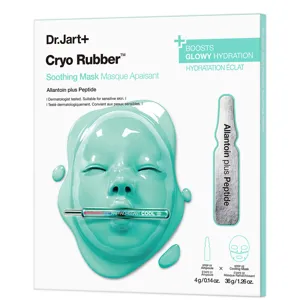
Sheet masks can help after a long flight. Choose fragrance-free if your skin reacts in heat. Keep one cooling mask for the first night, then rely on your gel-cream. Over-masking often backfires in humidity. A steady routine beats novelty.
Need a simple shopping route? Check our Anti Ageing Face Serums and Day Face Moisturisers. Use the filters for minis and travel formats. Add the shortlisters to your wishlist and we’ll alert you when a set bundles them at better value.
Cleansing that cuts through SPF, sweat and city grime
Heat-proof routines stack layers: sunscreen, sebum, dust, and often makeup. One gel cleanser can struggle against that cocktail. We suggest a two-step cleanse at the end of the day. Start with an oil, balm or micellar water. Follow with a low-foam wash. Both steps can fit carry-on.
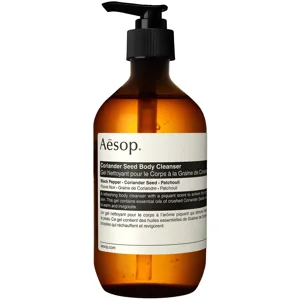
Mini micellar bottles clean sunscreen without a tap handy. Garnier’s 100 ml format pops up everywhere and travels well. For balm fans, small tins and 30 ml pots win on leak control. The Body Shop Camomile Cleansing Butter mini stays solid in a hot room and rinses clean. Clinique Take The Day Off minis also deliver in heat.
Pick a second cleanse that leaves no residue. Foaming gels with mild surfactants remove sweat without stripping. Save clay or scrub cleansers for home. They can irritate when skin already fights heat and UV.
Pack a microfibre face cloth and zip it in a sandwich bag. It boosts removal and dries fast. Keep any reusable pads bone-dry before you leave the room. Damp tools breed odour in the tropics. For more ideas, explore our curated Foam & Wash Cleansers. Shortlist a couple of minis and set a price alert. We track drops across Priceline, Chemist Warehouse and Adore Beauty, then nudge you when a saving appears.
Base makeup that won’t slide: primers, tints and setting
Heavy foundations fold fast in humidity. Heat exposes every emollient and every mistake. Successful travel bases grip, blur and breathe. You can build coverage with targeted concealer instead of a thick all-over layer.
We like a silicone-based primer with a soft matte finish. It stops sunscreen from eating your base and fills texture without weight. Tarte and pharmacy brands both offer travel tubes. Find one with polymers for hold and no heavy fragrance. Then pick a tint or a long-wear foundation in a mini.
For all-day events, Estée Lauder Double Wear in travel sizes still leads for reliability. It resists humidity and copes with sunscreen below. If you want less coverage, a skin tint with film formers keeps sheen in check. Powder foundation compacts also travel well. They double as blotting and touch-ups and they skip leak risk.
Set where you shine, not everywhere. Focus on the T-zone and under-eyes. Use a puff to press powder in rather than dusting widely. If you must carry a setting spray, shift it to checked luggage or buy at destination to dodge liquid limits.
Browse Face Primers and Liquid Foundations on GlamGeek. Filter for minis and long-wear claims. Add your two finalists to a wishlist. Our tracker catches bundle deals at Sephora Australia and MYER at peak travel times.
{{IMAGE:flatlay travel-size makeup minis sunscreen hat passport}}Eyeliner and mascara that survive humidity
Aussie humidity tests liners and lashes without mercy. Tubing mascaras crack the brief better than classic waterproof. They form heat-stable polymers around each lash. Removal also stays gentler, which matters after long sunscreen days.
Clinique Lash Power stays on in humidity and removes with warm water and light pressure. MAC Extended Play Gigablack knows the same trick with a slimmer brush. If you tolerate waterproof well, choose versions that promise smudge-resistance, not just water resistance. Heat breaks some waterproof films faster than a pool does.
For liner, gel pencils hold better than creamy kohl. Shiseido Microliner Ink glides, sets, and then minds its business in heat. Apply to upper lash line only if lower lids smudge on you. Avoid heavy lower-lid liner for tropical trips unless you love raccoon chic.
Keep a small spoolie and cotton buds in your pouch. They clean up a dot of transfer fast. If you meet an unexpected shower, leave your lashes alone. Tubing coats slide off if you rub them while wet. Wait, blot skin, then resume mascara peace.
We keep a close eye on value kits each season. Lash and liner duos in mini sizes often beat single SKUs on price per ml. Add a couple of picks from our Mascaras page to your wishlist and watch for set drops before school holidays.
Lip, cheek and multitaskers that carry the day
Heat loves cream sticks and balmy textures. They blend fast, need no brush, and forgive a handheld mirror. Multi-use sticks also stretch budget and space. One shade can do lids, cheeks and lips for beach-to-bar speed.
Choose glow, not slip. Look for silicone-wax blends that set. Dewy sticks should dry down after a minute. Tarte and pharmacy brands sell mini duos that deliver a soft flush without oil. If you prefer liquids, pick a stain that fixes after blending. Add balm for comfort on top.
Every travel lip wardrobe needs SPF. Look for at least SPF30 for beach days. Reapply often. Balms with zinc oxide or modern UV filters feel better than old-school sticks now. If your lips dry on planes, layer a ceramide balm at night and keep an SPF tint in your day bag.
Mini lipstick sets help you test shades under strong light. Bold reds shift warmer in Australian sun. Cooler pinks can turn chalky. Try before a big event if you can. MAC and Charlotte Tilbury rotate mini bullets in kits seasonally. Watch timing. The best colour mixes sell out fast.
Explore our edits for Lipsticks and Lip Balms & Creams. Add contenders to your wishlist. We’ll flag price swings across Sephora Australia and MYER as gift sets land.
Hair protection in sun, salt and hotel air-con
Hair needs as much strategy as skin on a hot trip. UV, salt and wind rough up cuticles fast. Hotel air-con then dries ends overnight. A small set of leave-ins keeps shine and reduces breakage. You don’t need a suitcase salon to get it right.
Pick a UV-protectant spray under 100 ml for day. It shields colour and helps hydrophobic sunscreen wash off your hairline at night. Follow with a light leave-in conditioner after each swim. Oils blend best on mid-lengths and ends in dry heat. Keep them away from the root in humidity to avoid flatness.
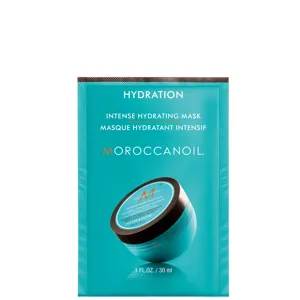
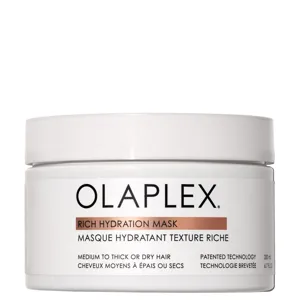
Minis from Kérastase travel well and cover both repair and gloss. Moroccanoil’s small bottles also slip into the quart bag when cabin rules apply. Pack a couple of treatment sachets for halfway through the trip. They revive sun-frazzled ends fast. Rinse in cool water for extra shine in hard-water hotels.
Dry shampoo minis earn their place for city days. They add lift and stretch styles between swims. Choose a fine mist or waterless powder that won’t clump in humidity. If you wear a hat, lift roots with dry shampoo after you take it off. Finish with a light brush to blend any residue.
For recovery nights, browse our Hair Masks and Moisturising & Nourishing Conditioners. Add a couple of minis to your GlamGeek wishlist. We’ll track deals at Adore Beauty and MYER and let you know when sets beat singles on value.
What this means: smart packing that avoids leaks and letdowns
Build your bag around heat-proof formats. Sticks, compacts, balms and powders resist pressure changes and hot rooms. Keep runny serums to a minimum. If you decant, use airless pump bottles that lock tight. Skip decanting sunscreen and unstable actives. They need factory packaging to hold up in heat.
Follow the 100 ml carry-on rule for liquids, aerosols and gels. The total must fit a one-litre zip bag at security. Minis make that easier, but volume still counts. Move aerosols like hair spray and larger setting mists to checked luggage when possible. Heat expands gas. Tight packing raises leak risk.
Pack smart tools. A small puff beats a big brush in humidity. It sets base without stirring sweat. A travel eyelash curler opens eyes fast on sleepy mornings. A microfibre towel cuts dry time at the beach house and reduces frizz. You don’t need a full kit. You need tools that serve multiple jobs.
Use pouches with structure. Hard-sided cases shield liquids from squeeze bursts in busy bags. Line a smaller pouch with cotton rounds to absorb drips if a cap loosens. Store SPF and lip balm in the coolest part of your tote. Don’t cook them in a car glove box.
Finally, shop with timing and alerts. Retailers bundle minis into sets just before school holidays and long weekends. Value often peaks then. Use GlamGeek wishlists on pages like Skin Care Sets and Makeup Sets. We’ll send a nudge when a kit undercuts singles, or when a heat-proof format comes back in stock.
We track prices and availability across Mecca, Sephora Australia, Priceline, Chemist Warehouse, Adore Beauty and MYER. Stock moves, but formats stay dependable. If a favourite mini sells out, swap by texture and claim the same result.
Which minis held up best on your last scorcher of a trip? Tell us what melted and what made it, and which heat-proof formats you want us to price-watch next summer.

![Lumene Nordic-C [Valo] Glow Cream Spf30](https://media.glamgeek.com/media/2026/02/06/c0cef909-16ab-49f9-865e-278e63871493_sm.jpg)